Introduction to Pumpkin Crisp
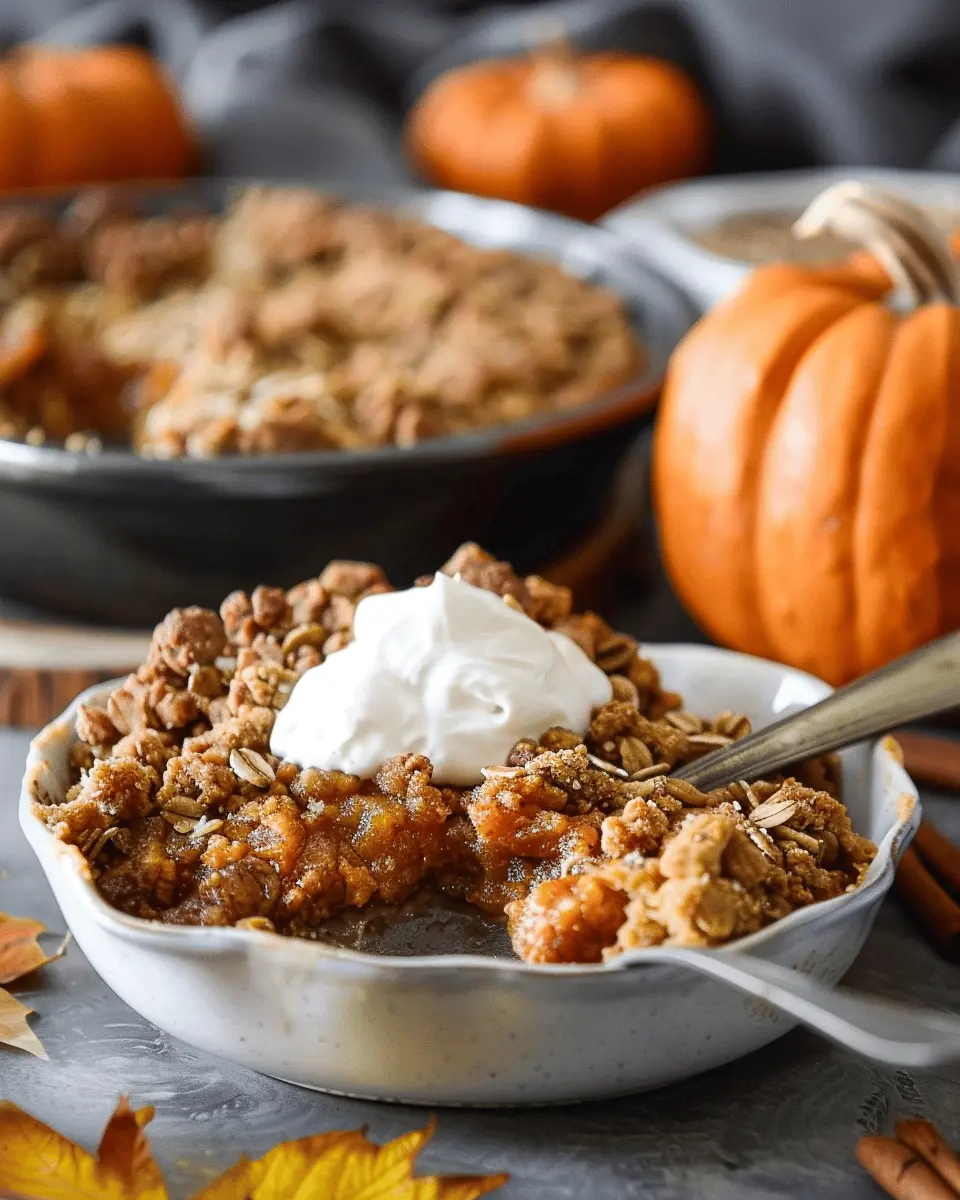
As the leaves turn golden and the air grows crisp, there's something intrinsically comforting about indulging in a warm dessert that captures the essence of fall. That’s where pumpkin crisp comes in — a delightful blend of flavors and textures that celebrates the season. Imagine a sweet, spiced pumpkin filling topped with a crunchy, buttery crust. This dish is akin to a warm hug on a chilly autumn evening.
Why Pumpkin Crisp is the Perfect Fall Dessert
You might be wondering, "What makes pumpkin crisp genuinely stand out among other fall desserts?" Here are a few reasons why this dish deserves a spotlight on your table:
-
Seasonal Ingredients: The primary star of pumpkin crisp is, of course, pumpkin, which is at its peak from late September through November. This versatile squash is packed with nutrients like Vitamin A and fiber. Pair it with spices like cinnamon and nutmeg, and you've created a symphony of smells that waft through your kitchen, elevating the mood of your home.
-
Effortless Preparation: One of the best things about pumpkin crisp is its simplicity. You don’t need to worry about complex techniques or high-end equipment. Just simple mixing and baking create a dish that is both approachable and impressive. This makes it ideal for young professionals juggling busy schedules but still wanting to showcase their culinary skills.
-
Versatile Serving Options: Whether you're hosting a cozy dinner party or enjoying a quiet night in, pumpkin crisp can adapt to the occasion. Serve it warm with a scoop of vanilla ice cream for a classic dessert experience, or enjoy it on its own with a cup of hot cider for those perfect fall evenings.
-
Cultural Connection: Pumpkin crisp is not just a dessert; it’s a connection to traditions and gatherings. Fall is a time for family, friends, and giving thanks, and sharing a homemade dessert cultivates community and warmth.
So, why not embrace the season and give this recipe a try? Check out sources like The Spruce Eats for more inspiration and tips on making the most of pumpkin in your baking adventures! Trust me, your taste buds will thank you.
Ingredients for Pumpkin Crisp
When it comes to creating the perfect pumpkin crisp, starting with the right ingredients is key. Here’s a helpful rundown of what you’ll need for this delicious fall dessert.
Essential components for the pumpkin pie layer
The heart of your pumpkin crisp is its rich pie layer. Here’s what you’ll need:
- Canned pumpkin: A 15 oz can of pure pumpkin provides that signature flavor. You can also roast and puree your own pumpkins if you’re up for a challenge!
- Brown sugar: About ¾ cup will give a warm, molasses-like sweetness to the mix.
- Eggs: Two large eggs help bind everything together while adding a bit of richness.
- Pumpkin spice: A mix of cinnamon, nutmeg, and cloves will elevate your dish; you can buy it or create a homemade blend.
- Evaporated milk: This will create a creamy texture and enhance the flavors.
Must-have ingredients for the cinnamon streusel
No pumpkin crisp is complete without its delightful topping. Here’s what you need for a perfect cinnamon streusel:
- Rolled oats: About 1 cup will give a chewy texture.
- All-purpose flour: A half-cup contributes to structure and crunch.
- Cinnamon: A teaspoon will pack in that fall flavor.
- Butter: Melted or softened, half a cup keeps the streusel crumbly and rich.
- Granulated sugar: This should also be about half a cup for sweetness.
With these essential ingredients, you're set to make an incredible pumpkin crisp that will impress your friends and family! For more tips on how to pick the best pumpkin, check out resources from The Spruce Eats or Food Network.
Preparing Pumpkin Crisp
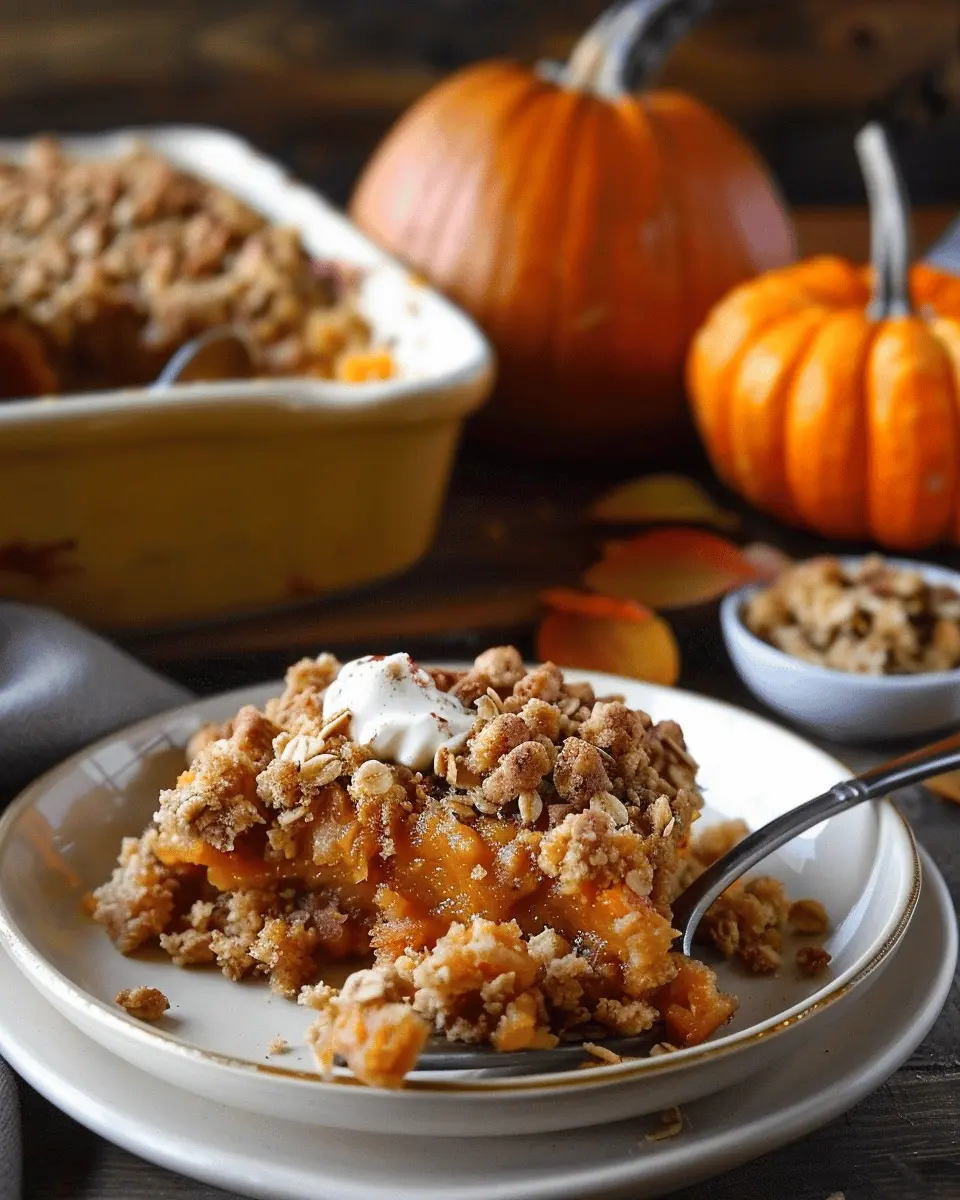
When the leaves start to turn and the air gets a little crisper, there’s nothing quite like the warmth of a homemade pumpkin crisp. This delicious dessert combines a creamy pumpkin layer with a crunchy streusel topping, making it perfect for gatherings, cozy nights in, or just because! Here’s how to bring this mouthwatering dish to life in your own kitchen.
Preheat Your Oven and Prepare the Baking Dish
First things first—take a moment to preheat your oven to 350°F. A properly heated oven is crucial for that perfect bake! While that's warming up, grab a 9x13-inch baking dish. Grease it lightly with butter or cooking spray to ensure your pumpkin crisp slides right out once it's baked. Personally, I love using parchment paper to line the bottom for an easy cleanup, plus it helps keep that crispy bottom layer intact.
Whisk Together the Pumpkin Pie Layer Ingredients
Now let’s make the heart of our pumpkin crisp! In a large mixing bowl, combine the following ingredients:
- 1 can (15 oz) pumpkin puree (not pumpkin pie filling)
- 1 cup granulated sugar
- ½ cup packed brown sugar
- 1 cup evaporated milk
- 3 large eggs
- 2 teaspoons pumpkin pie spice (or a mix of cinnamon, nutmeg, and ginger)
- 1 teaspoon vanilla extract
- A pinch of salt
Using a whisk, blend these ingredients until smooth and well combined. You want a velvety texture that screams fall! The balance of spices is what truly elevates this pie layer—don't be shy about incorporating more if you love that spicy kick. For a little tip, if you’re curious about the nutritional benefits of pumpkin, check out this detailed guide on Healthline.
Create the Cinnamon Streusel Topping
While the pumpkin layer is coming together, let's whip up the crunchy topping. In a separate bowl, mix:
- 1 cup rolled oats
- 1 cup all-purpose flour
- 1 cup packed brown sugar
- 1 teaspoon ground cinnamon
- ½ cup cold unsalted butter, cut into small cubes
Using your fingers or a pastry cutter, combine these ingredients until crumbly. You're going for that delightful texture that will bake to a crispy golden brown. If you feel adventurous, add a handful of chopped nuts or even some shredded coconut to give your topping a little extra flair.
Assemble and Bake the Pumpkin Crisp
Now comes the fun part—putting it all together! Pour the pumpkin layer mixture into your prepared baking dish, spreading it evenly. Next, sprinkle the cinnamon streusel on top. Make sure to distribute it in a way that every slice will get a little crunchy goodness.
Pop the dish into your preheated oven and let it bake for about 50-60 minutes, or until the edges are set, and the center is still slightly jiggly. Your kitchen will soon be filled with an irresistible aroma that makes it hard to wait!
Let It Cool Before Serving
Once the pumpkin crisp is out of the oven, resist the urge to dig in right away! Allow it to cool for at least 30 minutes on the countertop. This cooling time is essential; it helps the layers set up nicely, making it easier to cut and serve. Plus, patience pays off when those warm, cozy flavors of cinnamon and pumpkin greet you.
Serve your pumpkin crisp warm or at room temperature with a dollop of whipped topping or vanilla ice cream. Trust me; it's an upgrade you won’t regret! So, are you ready to spread the joy of this festive dessert with friends and family?
Variations on Pumpkin Crisp
Gluten-free Pumpkin Crisp
For those navigating a gluten-free lifestyle, you can still savor the delightful flavors of pumpkin crisp. Simply substitute regular flour with a gluten-free blend, such as almond flour or coconut flour. These alternatives not only keep the dish gluten-free but also add a nutty flavor to your crisp.
Using gluten-free oats instead of traditional oats is a simple yet effective swap, ensuring that your pumpkin crisp remains safe and delicious. Moreover, many store-bought gluten-free blends contain a mix of ingredients that can enhance the texture and flavor beautifully. Check out resources like The Gluten-Free Baking Academy for tips and recipe ideas that suit your diet perfectly.
Enhancing Pumpkin Crisp with Nuts or Chocolate
Feeling adventurous? Elevate your pumpkin crisp with the delicious addition of nuts or chocolate! Chopped pecans, walnuts, or even hazelnuts can introduce a satisfying crunch, complementing the creamy pumpkin filling.
If chocolate is more your style, why not fold in some dark chocolate chips? They’ll melt slightly and create a rich, decadent surprise in every bite. Additionally, you can sprinkle some chocolate chips over the top right before baking for an elegant touch that looks as good as it tastes.
It’s all about personalizing your pumpkin crisp to suit your taste buds. Perhaps you like a touch of spice; try adding a pinch of cinnamon or nutmeg. The beauty of this dish lies in its versatility. As you experiment with these variations, consider checking out Healthy Homemade Desserts for more inspiration on using seasonal flavors in baking. Enjoy transforming this classic dessert into something uniquely yours!
Cooking Tips and Notes for Pumpkin Crisp
Ensuring the Perfect Consistency for the Pumpkin Layer
Achieving the right consistency for the pumpkin layer of your pumpkin crisp is crucial for that smooth, delightful experience. Aim for a blend that’s creamy yet firm. Here are some tips to ensure success:
- Use Canned Pumpkin: Opt for pure canned pumpkin rather than fresh for better texture and convenience.
- Mix Thoroughly: When combining the pumpkin with eggs and spices, ensure there are no lumps. A hand mixer can be your best friend here!
- Taste and Adjust: Don’t forget to taste! If it seems too thick, a splash of milk or cream can help achieve the desired consistency.
Tips for Achieving a Golden-Brown Streusel
The streusel on top of your pumpkin crisp should be a showstopper! Here’s how to get that golden-brown, crunchy perfection:
- Butter Temperature: Use cold butter to create a crumbly texture. Cut it into the flour mixture rather than melting it; this keeps it flaky.
- Don’t Rush the Baking: If it looks pale, give it a few extra minutes in the oven. Patience pays off!
- Sprinkle Some Love: A light sprinkle of cinnamon or nutmeg right before baking can elevate the flavor in your streusel.
For additional baking tips and techniques, explore resources like the Food Network for even more delicious ideas. Happy baking!

Serving Suggestions for Pumpkin Crisp
Best accompaniments for pumpkin crisp
When it comes to enjoying your pumpkin crisp, think about pairing it with delightful accompaniments that really enhance the dish. Here are some ideas:
- Whipped Cream: A dollop of fresh whipped cream adds a creamy richness.
- Ice Cream: Vanilla or cinnamon ice cream creates a lovely contrast with the warm crisp.
- Nuts: Chopped pecans or walnuts can offer a delightful crunch alongside the soft pumpkin filling.
These simple additions can elevate your dessert experience and impress your guests.
Creative serving ideas for festive gatherings
Planning a festive gathering? Presenting your pumpkin crisp in creative ways can set the mood. Here are a few fun ideas:
- Individual Serving Cups: Consider serving small portions in mason jars for a charming, rustic feel.
- Layered Dessert Parfaits: Alternate layers of pumpkin crisp with yogurt or whipped cream for an eye-catching display.
- Themed Toppers: Use themed decorations or edible garnishes like cinnamon sticks or star anise to tie into fall festivities.
Not only do these ideas make for a beautiful presentation, but they also invite your guests to indulge in the flavors of the season. For more creative serving tips, you might enjoy checking out Taste of Home for additional inspiration!
Time Breakdown for Pumpkin Crisp
When diving into this delightful pumpkin crisp recipe, knowing how to manage your time can make the process enjoyable and stress-free.
Preparation Time
Getting your ingredients ready for your pumpkin crisp is a breeze—set aside about 15 minutes. This includes measuring out spices, cutting up any fresh ingredients, and mixing that fragrant batter.
Cooking Time
Once prepped, your dish will need around 30-40 minutes in the oven. You’ll want to keep an eye on it, making sure that top is golden brown and scrumptious.
Total Time
In total, you’re looking at about 50-55 minutes from start to finish. Perfect for a casual weekend baking session or a fun weeknight treat that’s sure to impress your friends.
For more tips on perfecting your pumpkin crisp, check out this great source for baking techniques!
Nutritional Facts for Pumpkin Crisp
Calories per serving
A serving of pumpkin crisp typically contains about 220 calories. This makes it a delightful yet guilt-free dessert option, especially during the cozy fall months.
Breakdown of key nutrients
Let’s dive into some of the nutritional nuggets that make this treat a worthwhile indulgence:
- Carbohydrates: Approximately 35g, providing a good source of quick energy.
- Proteins: Around 3g, thanks to the nuts or oats often included in the topping.
- Fats: About 8g, primarily from heart-healthy sources like nuts and butter.
- Fiber: Roughly 2g, aiding in digestion and keeping you full longer.
The vitamin A from pumpkin boosts your immune system, while cinnamon offers anti-inflammatory benefits. For a more detailed breakdown, you can explore resources from the USDA FoodData Central or Healthline.
With these nutritional highlights, pumpkin crisp is not just a delicious dessert; it’s also a smart choice to satisfy your sweet cravings while nourishing your body!
FAQ about Pumpkin Crisp
Can I make pumpkin crisp ahead of time?
Absolutely! One of the beautiful things about pumpkin crisp is its convenience. You can prepare the filling and topping separately in advance. Simply mix the pumpkin filling and set it in your baking dish, then store the topping in an airtight container. When you're ready to bake, just add the topping and pop it into the oven. This makes it perfect for planning holiday gatherings or busy weeknights.
How do I store leftover pumpkin crisp?
Leftover pumpkin crisp can be stored easily! Make sure to let it cool completely before covering it with plastic wrap or aluminum foil. You can keep it in the fridge for about 3-4 days. If you want to preserve its deliciousness for longer, consider freezing it. Just wrap individual portions tightly in freezer-safe containers. When you’re ready to enjoy, thaw it in the fridge overnight and reheat gently in the oven.
Can I substitute other squash for pumpkin puree?
Great question! Yes, you can use other varieties of squash in your pumpkin crisp recipe. Butternut squash is a popular substitute; it offers a similar sweetness and creaminess. You might also try acorn squash or even sweet potato for a twist. Just remember, the cooking time may vary slightly depending on the squash you choose, so keep an eye on those delicious flavors while baking!
For more tips on cooking with squash, check out The Spruce Eats, which offers a wealth of information on the versatility of various squashes. Happy baking!
Conclusion on Pumpkin Crisp
Why You Should Try Making Pumpkin Crisp This Season
As the days grow shorter and the air has an undeniable chill, why not embrace the warmth of a pumpkin crisp? This delightful dessert is a cozy way to celebrate the flavors of fall. Not only is it super easy to prepare, but it also fills your home with the inviting aroma of cinnamon and baked pumpkin, making it perfect for seasonal gatherings.
Imagine sharing this delicious treat with friends over a casual dinner or enjoying a quiet evening at home with a warm bowl and a scoop of ice cream on top. If you appreciate the taste of autumn, investing time in making this pumpkin crisp is an experience you won’t regret. It’s an irresistible treat that brings comfort and joy—what’s not to love?
For more pumpkin-inspired recipes, check out Pumpkin Pie Brownies or Pumpkin Spice Muffins to keep the autumn spirit alive!
PrintPumpkin Crisp: The Best Cozy Dessert for Fall Gatherings
A delightful and warm dessert perfect for autumn gatherings.
- Prep Time: 15 minutes
- Cook Time: 35 minutes
- Total Time: 50 minutes
- Yield: 8 servings 1x
- Category: Dessert
- Method: Baking
- Cuisine: American
- Diet: Vegetarian
Ingredients
- 2 cups canned pumpkin
- 1 cup brown sugar
- 1 teaspoon cinnamon
- ½ teaspoon nutmeg
- 1 cup quick oats
- ½ cup all-purpose flour
- ½ cup cold butter
- 1 cup chopped pecans
Instructions
- Preheat the oven to 350°F (175°C).
- In a bowl, mix together the pumpkin, brown sugar, cinnamon, and nutmeg until well combined.
- Spread the pumpkin mixture into a greased baking dish.
- In another bowl, combine the oats, flour, and chopped pecans.
- Cut in the cold butter until the mixture resembles coarse crumbs, then sprinkle over the pumpkin layer.
- Bake for 30-35 minutes or until golden brown.
- Let cool before serving.
Notes
- This dish pairs wonderfully with whipped cream or vanilla ice cream.
- Make sure not to overbake to keep the crisp texture.
Nutrition
- Serving Size: 1 serving
- Calories: 250
- Sugar: 12g
- Sodium: 150mg
- Fat: 10g
- Saturated Fat: 5g
- Unsaturated Fat: 3g
- Trans Fat: 0g
- Carbohydrates: 38g
- Fiber: 3g
- Protein: 3g
- Cholesterol: 20mg
Keywords: Pumpkin Crisp, dessert, fall, cozy, gatherings

Leave a Reply