Introduction to Easy Thumbprint Cookies
When you think of cookies that bring a dash of nostalgia, easy thumbprint cookies often come to mind. These delightful treats are not just any cookies; they're an experience of joy wrapped in a charming little package. The beauty of thumbprint cookies lies in their simplicity, making them the perfect baking project for both seasoned chefs and those just finding their way around the kitchen.
What’s the charm of thumbprint cookies?
At the heart of their allure is the unique “thumbprint” — a small indentation made by pressing your thumb into the dough. This little divot isn’t just for show; it’s a cozy cradle for filling. Whether you choose gooey fruit preserves or creamy icing, that bite-sized burst of flavor is what makes these cookies special. According to baking expert Rose Levy Beranbaum, the versatility of thumbprint cookies allows for endless possibilities when it comes to fillings and toppings. You can easily switch up flavors based on the season or your cravings!
Moreover, the preparation is a breeze. Only basic pantry ingredients are required, so you don’t have to worry about running to the store for a long list of items. Popular options include:
- All-purpose flour
- Sugar
- Butter
- Eggs
- Your favorite jam or icing!
Baking these cookies together can transform a simple afternoon into a fun bonding experience with friends or family. Picture it: laughter fills the room as you gather around the table, each person creating their thumbprints and choosing their own fillings. Not only are you making cookies, but you're also crafting memories.
If you want to dive into the specifics of making these delicious easy thumbprint cookies, check out some of the expert techniques at King Arthur Baking and get inspired to give it a go! It’s a wonderful way to express your creativity and enjoy the sweet rewards of baking. So let’s get started on this delightful journey of flavors and fun!
Ingredients for Easy Thumbprint Cookies
Making easy thumbprint cookies is a delightful and straightforward process, perfect for both baking beginners and seasoned pros. Here’s what you’ll need to whip up a batch of these scrumptious treats:
Essential Ingredients
- 1 cup unsalted butter – Softened to room temperature for easy mixing.
- ⅔ cup granulated sugar – This provides just the right amount of sweetness.
- 2 cups all-purpose flour – The base of your cookie dough.
- ½ teaspoon salt – To enhance the flavors.
- 1 teaspoon vanilla extract – A must for that warm, comforting aroma.
- ½ teaspoon almond extract – Optional, but it adds a lovely twist.
- Jam or icing – For the classic thumbprint filling. Strawberry or raspberry jams work beautifully, or you can opt for a simple royal icing.
- Optional toppings – Consider chopped nuts or coconut for additional flavor and texture.
With these ingredients, you'll be well-equipped to create easy thumbprint cookies that are sure to impress. If you're curious about the history and variations of these cookies, check out this detailed article on cookie history as you get started! Happy baking!
Preparing Easy Thumbprint Cookies
If you're looking to impress friends or family with a delightful treat that's simple to make, then easy thumbprint cookies might just be your new go-to recipe! With their inviting shapes and delightful icings, these cookies are perfect for any occasion. Let’s walk through how to prepare them step by step.
Gather Your Ingredients
The first step in our cookie-making adventure is to gather your ingredients. A well-prepared baker is a happy baker! Here’s what you will need:
- 1 cup unsalted butter, softened
- ¾ cup granulated sugar
- 1 large egg yolk
- 1 teaspoon vanilla extract
- 2 cups all-purpose flour
- ¼ teaspoon salt
- Your choice of icing or jam for filling (feel free to experiment with flavors)
All set? Great! Make sure you have a suitable baking sheet lined with parchment paper for easy cleanup.
Cream the Butter and Sugar
Now it's time to get mixing! Start by creaming the softened butter and sugar together in a large mixing bowl. You can use an electric mixer for a quick mix, or beat it by hand if you’re looking for a little workout. The goal here is to achieve a light and fluffy texture—this should take about 3-5 minutes.
Why is this step important? Well, creaminess helps to trap air in the mixture, which in turn helps your cookies rise and maintain an airy texture. For more tips on mixing techniques, check out this baking guide.
Incorporate the Egg Yolk and Vanilla
Next, add the egg yolk and vanilla extract to the creamed butter and sugar. Make sure to beat them in well until fully combined. The egg yolk adds richness that makes the cookies tender, while vanilla brings a warm, aromatic flavor that elevates every bite. Can you already smell the cookies baking?
Mix in the Flour Gently
Time to mix in the flour! Gently add the all-purpose flour and salt to your mixture, stirring with a spatula to keep it truly light and airy. Avoid over-mixing—this will lead to tougher cookies. Remember, we want them to melt in your mouth. If you’d like to explore alternative flours, consider reading about their unique characteristics on Serious Eats.
Shape the Cookie Dough
Once you have a smooth dough, it’s time to get hands-on and shape the cookies. Take small portions of dough (about a tablespoon) and roll them into balls between your palms. Place the dough balls onto your prepared baking sheet, spacing them about two inches apart.
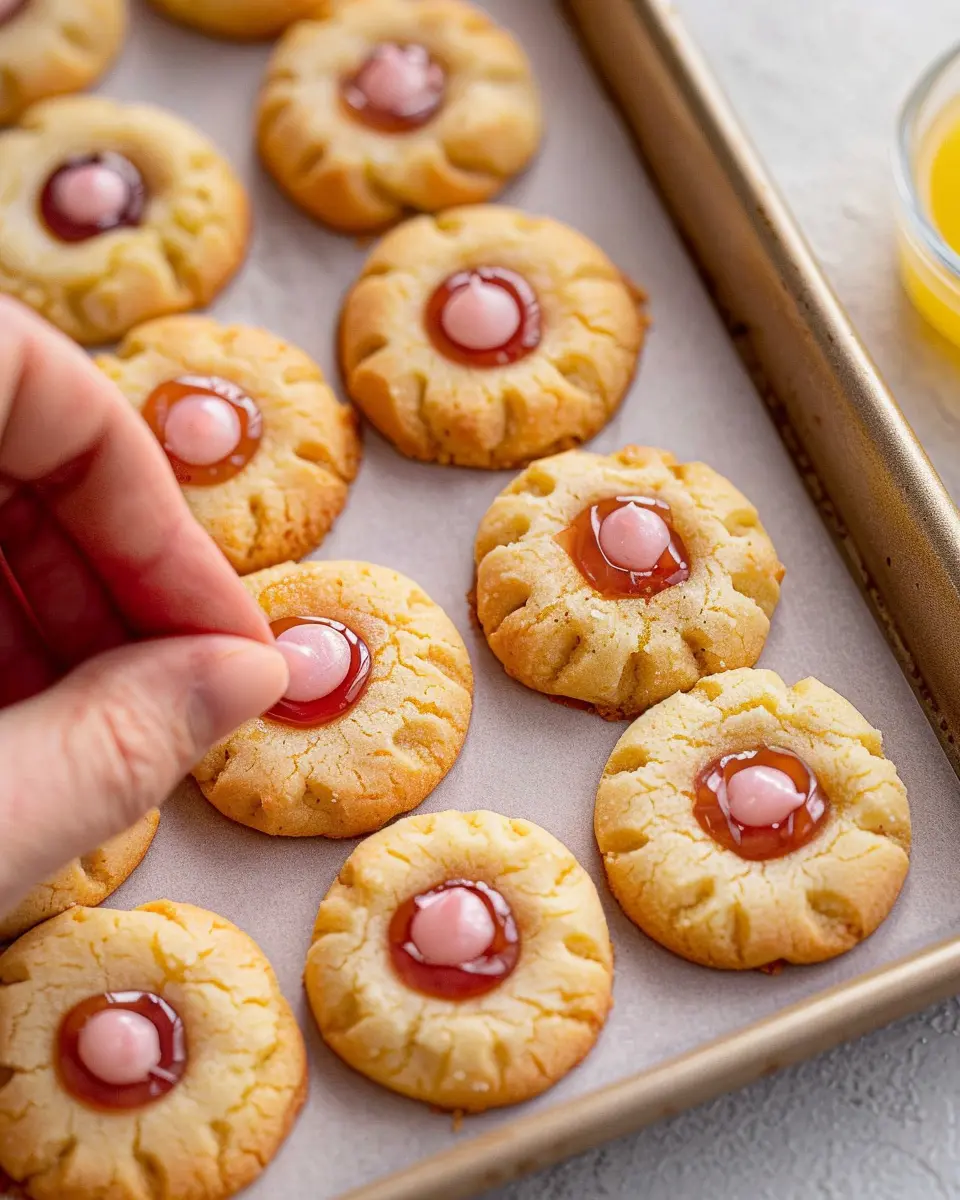
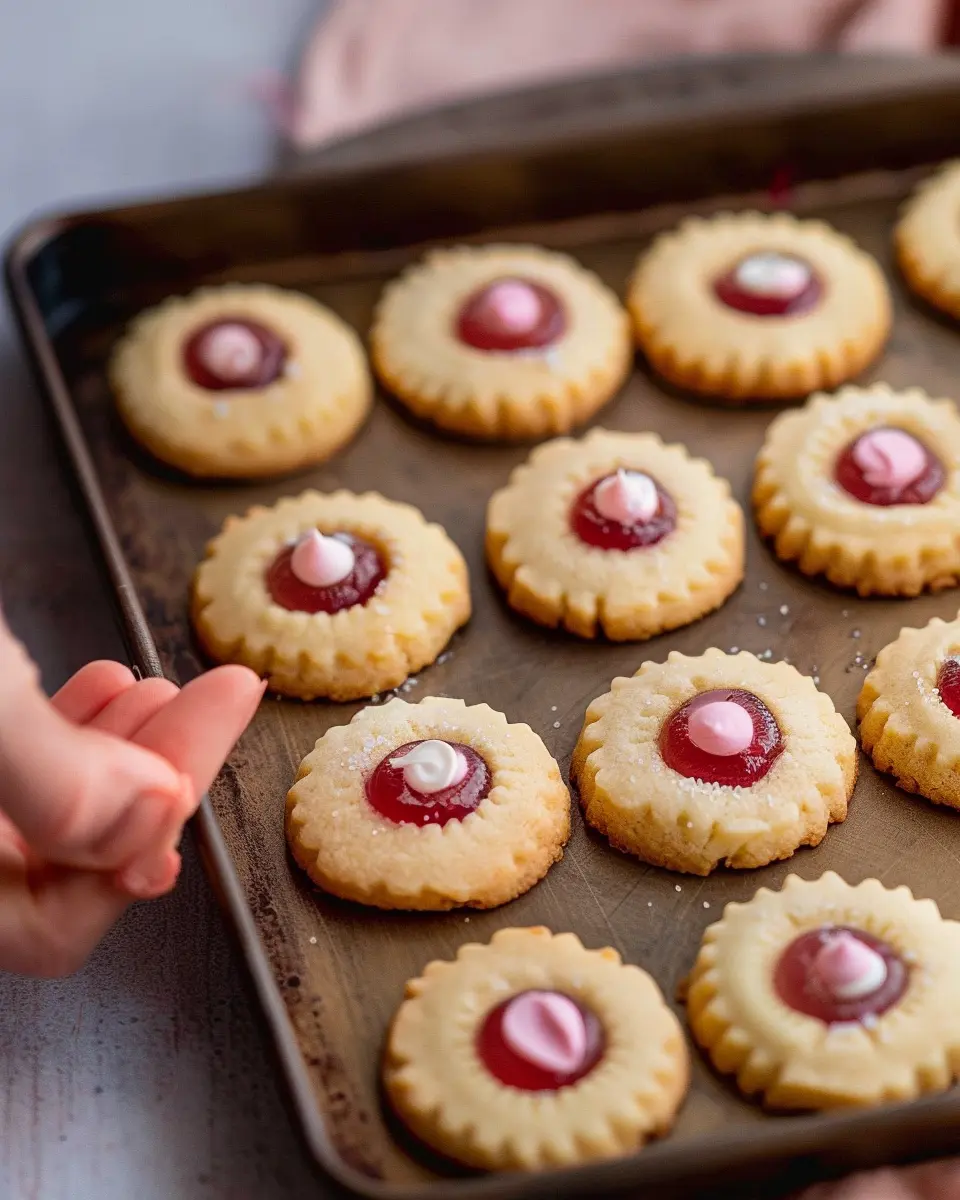
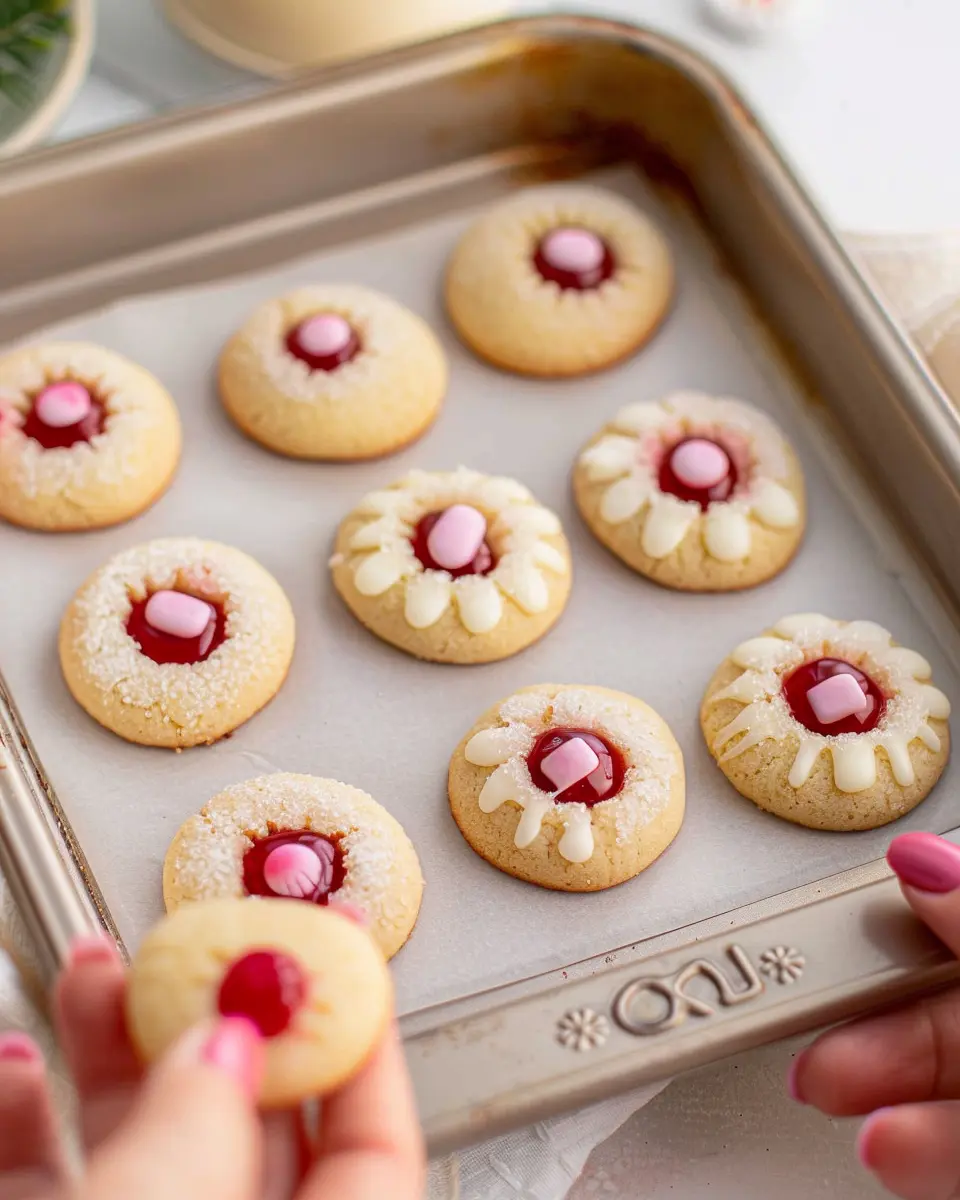
Create the Thumbprint
Here comes the fun part! Using your thumb or the back of a spoon, create an indentation in the center of each cookie ball. This is where the magic happens—your icing or jam will sit neatly in these little pockets, waiting to melt into your mouth.
Bake the Cookies to Perfection
Preheat your oven to 350°F (175°C) and pop those beauties in for about 10-12 minutes, or until the edges are a light golden brown. Don’t worry if your cookies crack a little—that’s part of their charm! Once your easy thumbprint cookies are done baking, let them cool on the baking sheet for a few minutes before transferring them to a cooling rack.
As those delightful cookies cool, you can whisk together your icing or prepare your jam filling. When they’re completely cooled, fill the centers with your chosen icing or preserve.
And there you have it—your very own batch of easy thumbprint cookies! Whether you’re enjoying them yourself or sharing with friends, these charming treats are sure to be a hit. Happy baking!
Icing Variations for Easy Thumbprint Cookies
When it comes to customizing your easy thumbprint cookies, the icing options are where your creativity can really shine! Elevating these cookies from delightful to stunning can be as simple as picking the right icing. Let's dive into some classic and colorful ideas that will make your cookies stand out at any gathering.
Classic icing options
For those who prefer a timeless touch, traditional icing recipes serve as the perfect complement to your easy thumbprint cookies.
-
Royal Icing: This smooth and glossy icing can be piped or spread over your cookies. Combine powdered sugar, egg whites, and lemon juice for a sweet and tangy finish. Not only does it taste great, but it also hardens well, making your cookies easier to transport.
-
Simple Glaze: Mix powdered sugar with a splash of milk or water to create a smooth, drizzling glaze. Adding a few drops of vanilla or almond extract can elevate the flavor beautifully.
Colorful icing ideas for special occasions
If you're looking to add some extra flair for birthdays or holidays, colorful icing is the way to go!
-
Colorful Buttercream: Whip up a batch of classic buttercream and divide it into bowls. Add food coloring to create vibrant hues. Use a piping bag for intricate designs that will wow your guests!
-
Themed Icing: Think about your occasion! For Christmas, green and red icing will do the trick, while pastel shades work wonders for spring celebrations. You can even create a rainbow effect by layering different colors!
Making your easy thumbprint cookies special with various icing options not only enhances their flavor but also adds a personal touch. These variations will surely leave a lasting impression on your guests! For more ideas and recipes, check out Joy of Baking or Sally's Baking Addiction for inspiration.
Baking Tips and Notes for Easy Thumbprint Cookies
Baking easy thumbprint cookies is a delightful experience that anyone can master! Here are some tips to ensure your cookies turn out perfectly every time.
Use Room Temperature Ingredients
For the best texture, make sure your butter and eggs are at room temperature. This helps create a smooth dough that holds its shape when baking.
Choose Your Fillings Wisely
Explore different fillings like jam, Nutella, or homemade lemon curd. To boost flavor, consider blending contrasting elements, such as a zesty citrus with a sweet base. Homemade jams can be an exquisite option—check out this guide to making fruit preserves.
Don’t Skip the Cooling Step
Let your cookies cool completely before icing. This way, the icing won’t melt off, and you’ll have beautiful, decorated cookies to impress your friends!
Experiment with Flavors
Try adding vanilla extract, almond extract, or even citrus zest to your dough for an aromatic twist. You can even personalize your icing with food coloring or flavored extracts.
With these tips, you are well on your way to creating deliciously easy thumbprint cookies that will make everyone smile!
Serving Suggestions for Easy Thumbprint Cookies
When it comes to easy thumbprint cookies, serving them in creative ways can elevate their appeal and make your gatherings even more delightful. Here are some fun and tasty ideas:
Pair with Your Favorite Beverages
Thumbprint cookies are flexible! Consider serving them with a chilled glass of milk, herbal tea, or even a rich coffee for those cozy evenings. The sweet icing filling pairs beautifully with a variety of drinks.
Create a Dessert Platter
Make your dessert table pop by including easy thumbprint cookies alongside an assortment of other treats. Think brownies, fruit tarts, or even some delectable chocolate-covered strawberries. The contrast of flavors will wow your guests.
Festive Packaging
If you’re looking for a thoughtful gift, wrap your cookies in a decorative box or treat bag. Add a personal touch with a handwritten note—the perfect way to spread sweetness during holidays or special occasions.
Flavor Variations
Don’t be afraid to get creative! Instead of the usual jelly or icing, try fillings like Nutella or lemon curd. This can keep things interesting and cater to different taste preferences.
Remember, serving easy thumbprint cookies isn’t just about the cookies; it’s about creating a delightful experience for everyone involved! For more tips on cookie pairings, check out sources like Serious Eats or Bon Appétit for inspiration.
Time Breakdown for Easy Thumbprint Cookies
Preparation Time
Making easy thumbprint cookies begins with about 15-20 minutes of prep. You'll want to gather your ingredients, preheat your oven, and get your workspace ready. This step sets the stage for delicious results, so take your time to measure everything precisely.
Baking Time
Once your dough is ready, it’s time to indulge your kitchen with the aroma of freshly baked cookies. Baking these delightful cookies will take approximately 12-15 minutes. Keep an eye on them, so they don't overbake—golden edges are the perfect sign they’re done!
Total Time
In total, you’re looking at around 30-35 minutes from start to finish, giving you plenty of time to enjoy creating these easy thumbprint cookies. Consider pairing them with a warm beverage for a cozy treat. Want to know more about baking? Check out resources from King Arthur Baking or Sally's Baking Addiction. You'll find a plethora of tips to elevate your baking skills!
Nutritional Facts for Easy Thumbprint Cookies
When indulging in easy thumbprint cookies, it’s essential to know what you’re savoring. Here’s a quick breakdown of the nutritional facts:
Calories per cookie
Each delicious thumbprint cookie typically contains around 80-100 calories. It’s an ideal treat for a mid-afternoon pick-me-up or a sweet addition to your next gathering.
Sugar content
These cookies usually have approximately 6-8 grams of sugar per cookie. While this makes them a delightful way to satisfy your sweet tooth, be mindful of your total daily sugar intake—especially if you’re watching your health.
Serving size
A standard serving size is generally considered to be 2-3 cookies. Depending on your appetite and occasion, you might find yourself reaching for a few more, but moderation is key to enjoying these treats responsibly.
For more information on sugar and calorie content in baked goods, check out reliable sources like the USDA FoodData Central or Nutrition.gov. Enjoy your baking!
FAQs about Easy Thumbprint Cookies
How do I make easy thumbprint cookies without eggs?
Great question! If you're looking to whip up easy thumbprint cookies without eggs, you can simply substitute them with a few alternatives. Try using:
- Unsweetened applesauce: ¼ cup replaces one egg.
- Mashed bananas: ¼ cup for a slight flavor twist.
- Flaxseed meal: Mix 1 tablespoon of flaxseed meal with 2.5 tablespoons of water and let it sit for a few minutes.
These substitutes maintain moisture and binding in your cookies, ensuring they remain soft and delicious.
Can I freeze thumbprint cookies?
Absolutely! Freezing is a fantastic way to extend the life of your easy thumbprint cookies. Here’s how:
- Before baking: Shape the cookies and place them on a baking sheet. Freeze until firm, then transfer them to an airtight container or freezer bag. They can last up to three months.
- After baking: Let the cookies cool completely, then freeze them in a similar manner. Thaw them at room temperature when you're ready to enjoy!
What can I use for fillings besides icing?
While icing is a classic filling, don't hesitate to get creative! Consider using:
- Fruit preserves or jams: Try raspberry, apricot, or strawberry for a fruity burst.
- Nut butters: Almond or peanut butter adds a delightful twist.
- Chocolate ganache: For the chocolate lovers out there, this would be heavenly!
Thumbprint cookies are versatile, so feel free to experiment with fillings that excite your taste buds. For additional ideas, check out the Joy of Baking for more creative options!
Conclusion on Easy Thumbprint Cookies
In wrapping up our delightful journey into the world of easy thumbprint cookies, it’s clear these treats are a must-try for every cookie lover. With their tender, buttery texture and sweet icing filling, they’re perfect for sharing at gatherings or enjoying at home. Plus, they’re versatile; feel free to swap out the icing for your favorite jam if you prefer.
Baking doesn’t just satisfy your sweet tooth but also brings joy and creativity into your kitchen. So grab your ingredients, preheat that oven, and create your own batch of easy thumbprint cookies. They’re sure to become a favorite in no time! For more baking tips, check out resources from The Joy of Baking or BBC Good Food. Happy baking!
PrintEasy Thumbprint Cookies with Icing Filling: The Best Recipe for Homemade Delight

Learn how to make the perfect thumbprint cookies filled with icing, a delightful treat for any occasion!
- Prep Time: 15 minutes
- Cook Time: 15 minutes
- Total Time: 30 minutes
- Yield: 24 cookies 1x
- Category: Dessert
- Method: Baking
- Cuisine: American
- Diet: Vegetarian
Ingredients
- 2 cups all-purpose flour
- 1 cup unsalted butter, softened
- ¾ cup granulated sugar
- ¼ teaspoon salt
- 1 teaspoon vanilla extract
- ½ cup icing sugar
- 3 tablespoons milk
Instructions
- Preheat the oven to 350°F (175°C).
- In a mixing bowl, cream together the butter and sugar until light and fluffy.
- Add the vanilla extract and salt, mixing well.
- Gradually add the flour until the dough comes together.
- Roll into balls and place on a baking sheet, making a thumbprint in the center of each.
- Bake for 12-15 minutes or until lightly golden.
- For the icing, mix the icing sugar with milk until smooth and drizzle over cooled cookies.
Notes
- Keep the cookies in an airtight container to maintain freshness.
- Try different flavors for the icing by adding lemon or almond extract.
Nutrition
- Serving Size: 1 cookie
- Calories: 150
- Sugar: 10g
- Sodium: 50mg
- Fat: 8g
- Saturated Fat: 5g
- Unsaturated Fat: 3g
- Trans Fat: 0g
- Carbohydrates: 20g
- Fiber: 0g
- Protein: 2g
- Cholesterol: 30mg
Keywords: easy thumbprint cookies, cookies with icing, homemade cookies, baking recipe

Leave a Reply