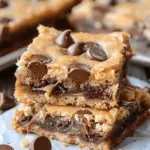
Introduction to Delicious Bars Recipe
In the fast-paced world where young professionals find themselves hustling between work meetings, social gatherings, and personal commitments, finding nutritious and satisfying snacks can be quite the challenge. Enter the homemade bars recipe—a game changer that not only caters to your busy lifestyle but also offers the flexibility to whip up a healthy treat that curbs those afternoon slumps.
Consider how often you’ve reached for convenience snacks during a busy day. According to a study by the Harvard T.H. Chan School of Public Health, pre-packaged snacks often contain high levels of sugar and unhealthy fats, leaving you in a cycle of energy spikes and crashes. When you make your own bars, you control the ingredients—think protein-packed nuts, whole grains, and natural sweeteners. This balance is crucial, especially when you’re juggling demanding projects and tight deadlines.
Beyond health benefits, there’s a creative satisfaction that comes with crafting your own snacks. Imagine mixing and matching flavors that resonate with your personal taste—perhaps a combination of rich dark chocolate, nutty almond butter, and chewy oats. Plus, making a batch of bars means you’ll always have a quick, grab-and-go snack on hand, cutting down those last-minute store runs. As someone who often juggles a variety of tasks throughout the day, I can attest that having a stash of homemade bars gives me the motivation to power through even the most hectic weeks.
So, why not explore this delicious avenue? This bars recipe will guide you through straightforward steps to create bars that are as versatile as they are yummy. Whether you fancy nutty flavors, fruity bites, or a decadent chocolatey treat, there’s something in here that’s bound to resonate with your palate.
If you’re ready to treat yourself and boost your snack game, let’s dive into this accessible and nutritious recipe that promises to keep you energized—all while giving you the ultimate satisfaction of home-cooked goodness! Check out resources like the American Heart Association for more insights on healthy eating habits that suit your busy lifestyle.
Ingredients for the Ultimate Bars Recipe
Essential ingredients
Creating the perfect bars recipe starts with selecting the right foundational ingredients. You’ll need:
- Oats: Use rolled oats for a hearty texture.
- Nut butter: Almond or peanut butter works wonders for binding.
- Sweetener: Honey or maple syrup adds a natural sweetness.
- Protein: Add protein powder for an energizing boost.
- Base: Choose whole grains like quinoa or brown rice for added nutrition.
These core elements create a balanced base, but let’s look at how you can jazz things up.
Optional mix-ins and toppings
Once you’ve got your essentials, it’s time to let loose with creative flair! Consider adding:
- Nuts: Chopped almonds or walnuts for a satisfying crunch.
- Dried fruits: Raisins, cranberries, or chopped dates for a chewy texture.
- Seeds: Flax or chia seeds boost the nutrient profile.
- Chocolate chips: Because who doesn’t love a little chocolate?
- Spices: A dash of cinnamon or vanilla extract for that extra kick.
Don’t be afraid to experiment—everyone’s favorite bars recipe is a bit different, and making it your own can be part of the fun! For countless variations, check out resources like Minimalist Baker for more inspiration. Happy baking!
Step-by-step Preparation of Bars
Making delicious bars can feel intimidating, but following a simple and structured approach will lead you from a jumble of ingredients to the sweet, melt-in-your-mouth delights you envision. Here are the steps that will guide you through this bars recipe seamlessly.
Gather your ingredients
Before diving into mixing and baking, make sure you have all your ingredients ready. This not only streamlines the process but also ensures you don’t forget anything essential. For our bars, you’ll typically need:
- All-purpose flour
- Baking powder
- Salt
- Unsalted butter (softened)
- Granulated sugar
- Brown sugar
- Eggs
- Pure vanilla extract
- Optional: chocolate chips, nuts, or dried fruit
Take a moment to gather everything together on your countertop. A well-organized workspace can make the whole baking experience more enjoyable! If you’re looking for ingredient substitutes or recommendations, check out resources like King Arthur Baking for ideas and tips.
Prepare the dry ingredients
Now we’re moving into the foundational steps. Start by sifting together the dry ingredients in a mixing bowl. This usually includes flour, baking powder, and a pinch of salt. Sifting can help combine these elements harmoniously, enhancing the overall texture of your bars.
- Tip: If you don’t have a sifter, just whisk the dry ingredients together to incorporate air, preventing clumps.
It’s essential to get these dry ingredients right, as they provide the structure for your bars. Once mixed, set the bowl aside to focus on the wetter components.
Cream the butter and sugars
In a large mixing bowl, combine the softened butter with the granulated and brown sugars. You can use an electric mixer or do it by hand with a whisk or wooden spoon, especially if you prefer a workout!
- Mix until the combination is light and fluffy, generally for about 2-3 minutes. The creaming process creates air pockets, which can lead to a delightful texture in your finished bars.
Incorporate eggs and vanilla
Next up, add in the eggs and vanilla extract to your butter-sugar mixture. Beat these in until they’re fully incorporated.
- Fun fact: The eggs serve as a binder and also add moisture to your bars, supporting an irresistibly chewy or fudgy finish, depending on your recipe.
Make sure to scrape down the sides of the bowl occasionally to ensure no clumps remain, which can cause uneven baking later on.
Combine everything
Now it’s time to bring the dry ingredients into the mix! Gradually add the dry mixture to your wet ingredients. Stir just enough to integrate everything together – overmixing can lead to tough bars.
- Here’s your chance to fold in any extra goodies you have, like chocolate chips, nuts, or dried fruit.
This step is crucial as it determines the final texture and flavor mix.
Bake the base and prepare the caramel
Preheat your oven to 350°F (175°C), and line a baking dish with parchment paper for easy removal. Pour your mixed batter into the dish and smooth the top.
- While it bakes for around 25-30 minutes, you can prepare the caramel sauce if you’re incorporating it. Simply melt some caramel candies with a splash of heavy cream over low heat until smooth.
Make sure to check the base with a toothpick; if it comes out mostly clean, it’s time to move on!
Assemble and bake the bars
Once your base has cooled slightly, drizzle the melted caramel over it. You can create swirls or a layer—whatever delights your palate! Return the bars to the oven for an additional 10 minutes to allow the caramel to set into the base.
- After baking, let your bars cool completely in the pan. This waiting game is tough but essential for slicing clean bars!
Indulge in the satisfaction of your homemade bars. Sharing them with friends or family can enhance the enjoyment, and, of course, they make for a lovely treat at any gathering. You’ll soon find that this bars recipe is one you come back to again and again!
Variations on Bars Recipe
When it comes to crafting the perfect bars recipe, there are endless possibilities to explore! Whether you prefer something rich and chocolatey or light and fruity, we’ve got you covered with variations that will delight your taste buds. Let’s delve into a few delicious options!
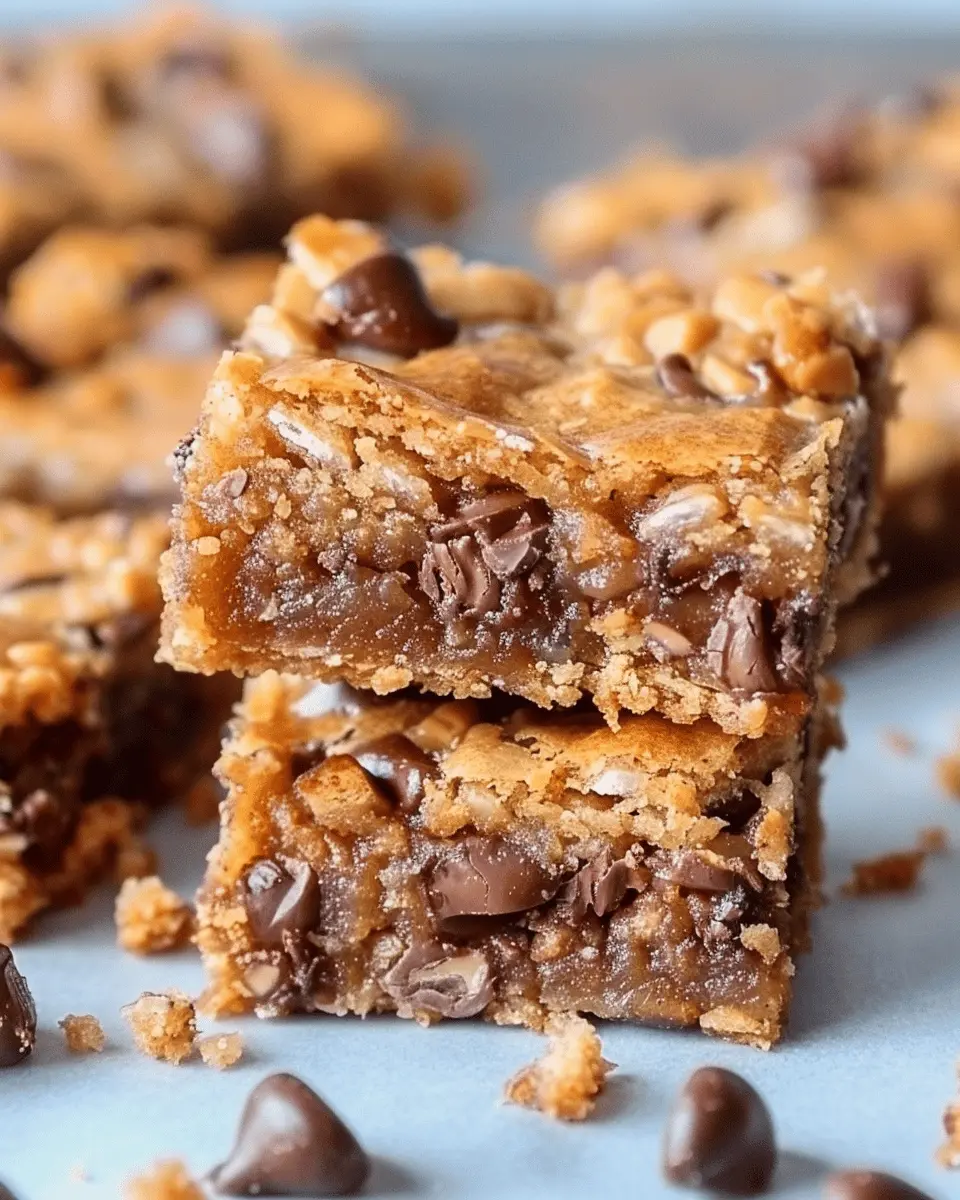
Chocolate Chip Peanut Butter Bars
If you’re a fan of classic flavors, try these chocolate chip peanut butter bars. Combine:
- 1 cup of peanut butter
- ½ cup of brown sugar
- 1 cup of quick oats
- 1 cup of chocolate chips
Mix until combined and pour into a greased baking pan. Bake for about 20-25 minutes at 350°F. This scrumptious blend is not only easy to whip up, but it also offers a satisfying balance of sweet and salty—and you can even substitute Turkey Bacon for a crunchy topping!
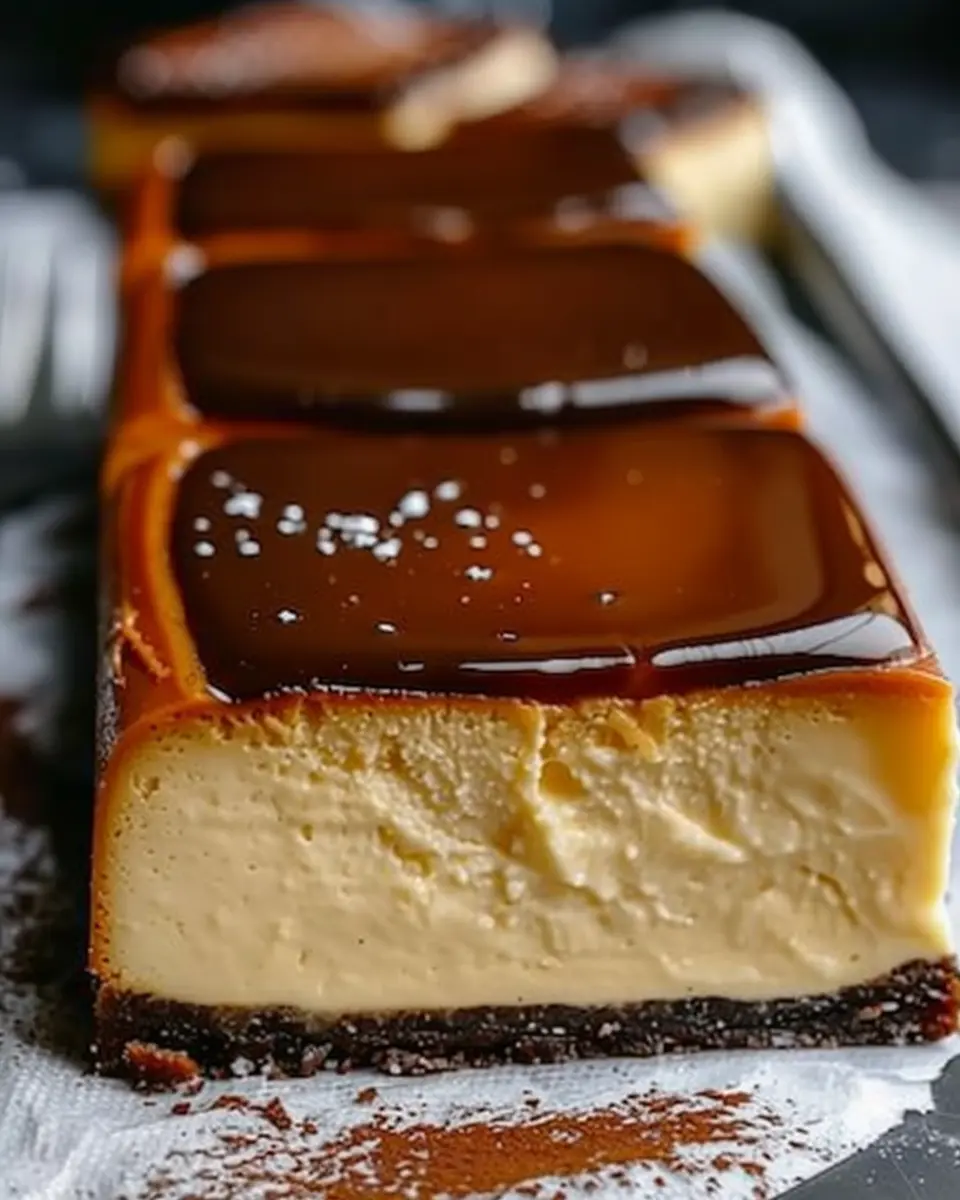
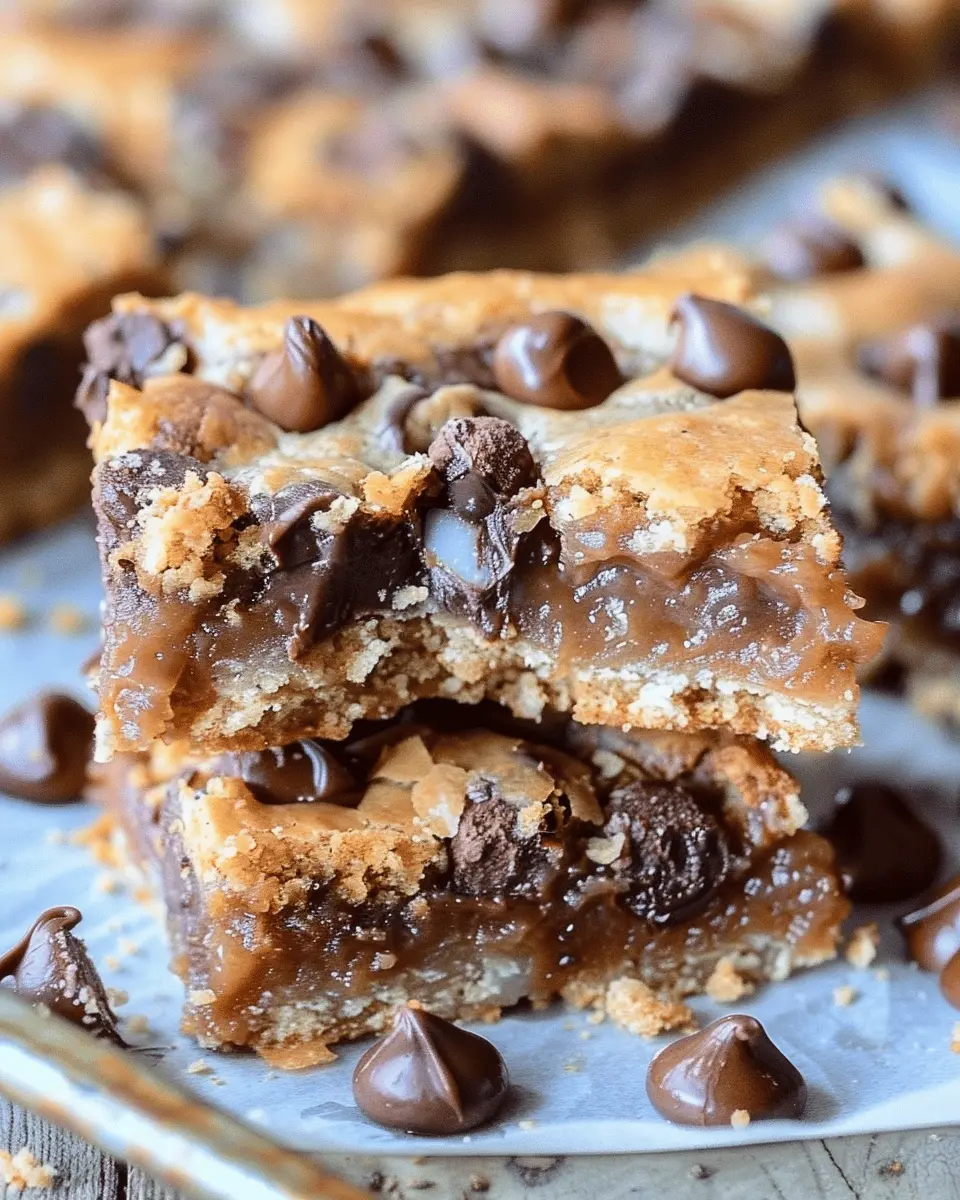
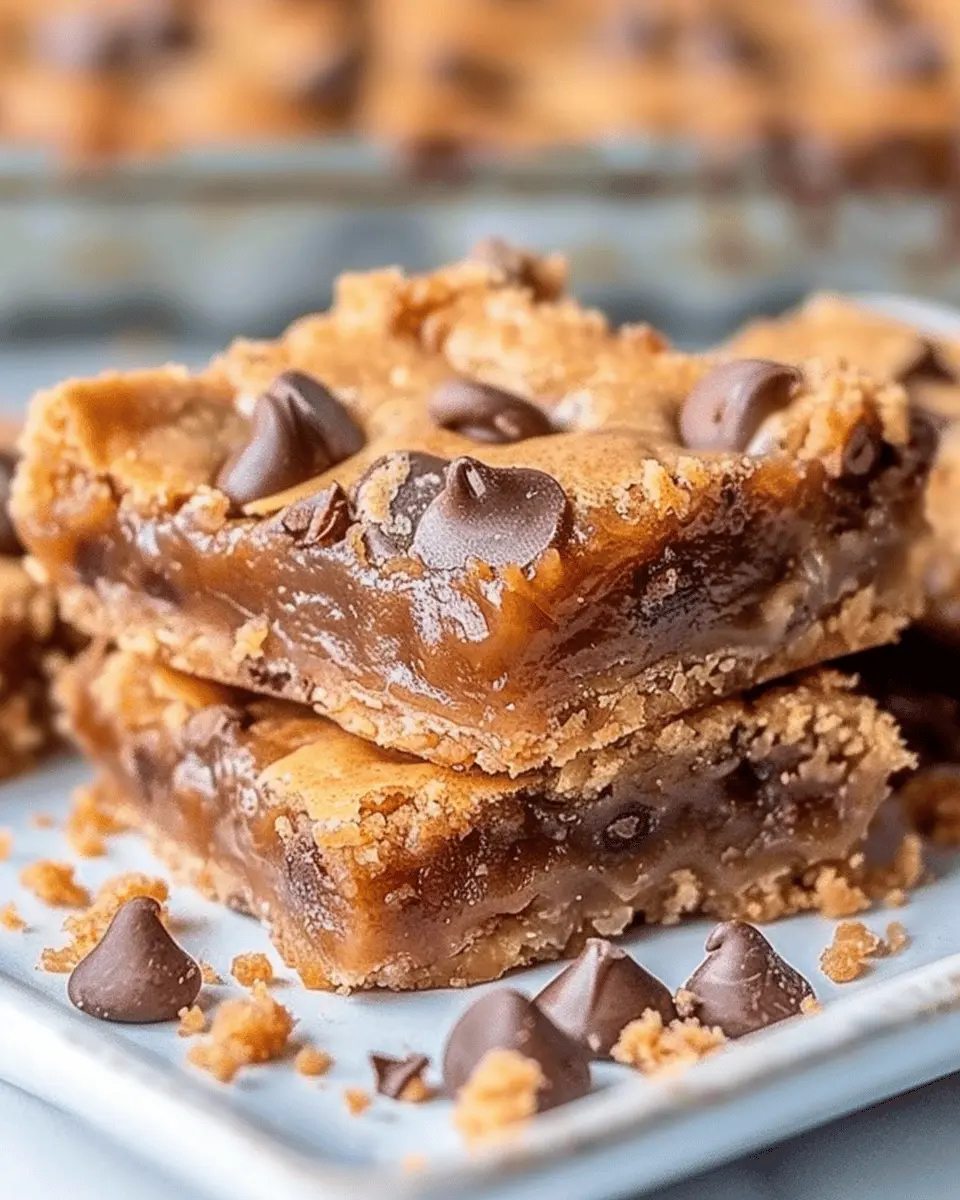
Nutty Caramel Bars
For a richer experience, indulge in these nutty caramel bars. Using a base of:
- 1 cup of graham cracker crumbs
- ½ cup of melted butter
- 1 cup of mixed nuts
Press this mixture into your baking dish, then pour over a homemade caramel layer made from sugar and butter (check out this recipe for a simple homemade caramel). These bars are a perfect snack for movie night or as a treat for unexpected guests!
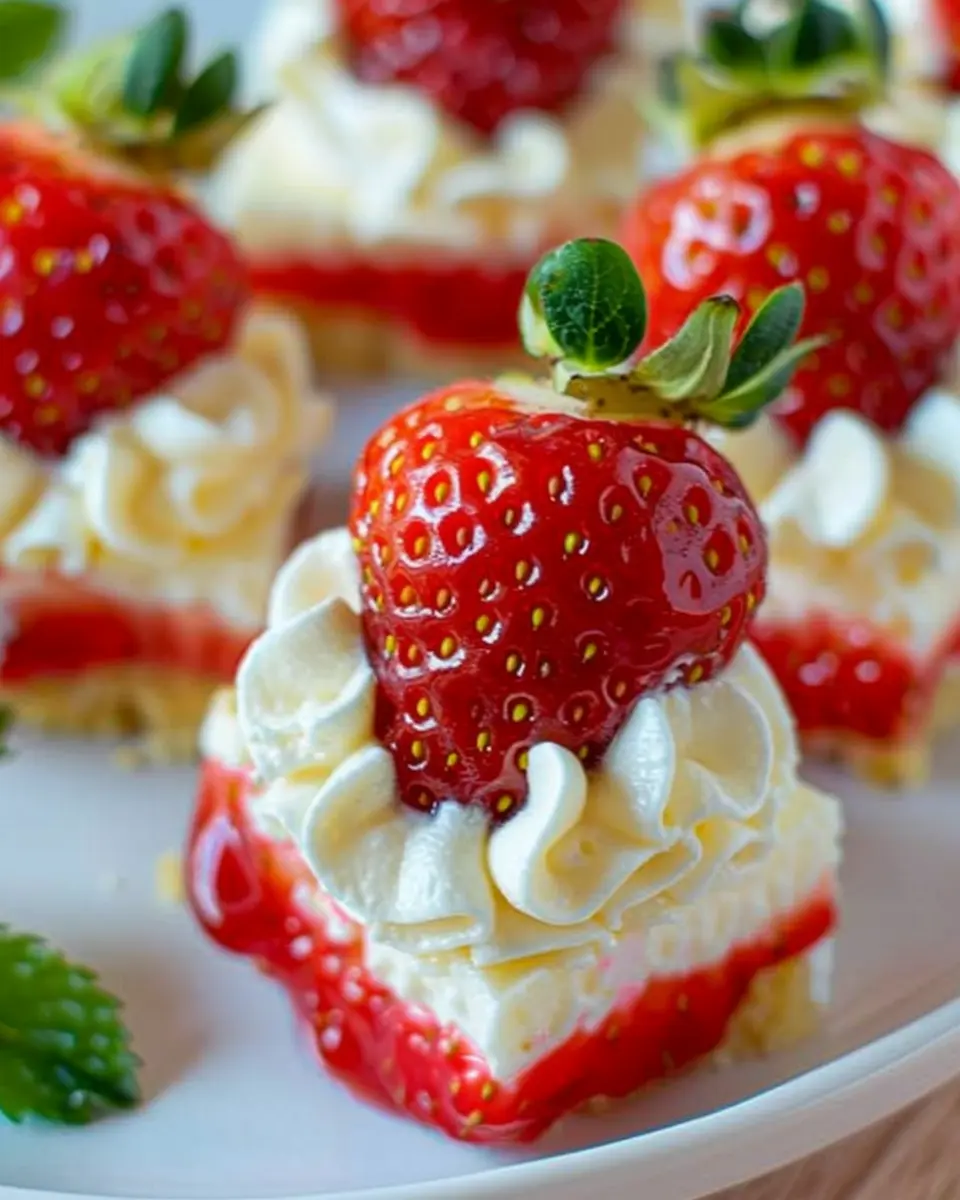
Seasonal Fruit Bars
As the seasons change, so should your snacks! Make use of fresh fruit with these seasonal fruit bars. Think about incorporating:
- 2 cups of berries (strawberries, blueberries, or peaches)
- ½ cup of honey or maple syrup
A splash of natural yogurt in the mixture can offer a delightful creaminess. These bars are not only refreshing but can also be a healthier option when you’re craving something sweet. Plus, it’s a great way to support local farmers by using fresh, in-season produce!
With these variations on your bars recipe, you’re all set to impress your friends and family. Which one will you try first? For more ideas, check out Epicurious for other sweet bar recipes!
Cooking Tips and Notes for Perfect Bars
Achieving the Right Texture
The texture of your bars recipe can make or break the dish. To get that ideal chewy yet firm consistency, ensure you don’t overmix your batter. Think of it like a workout—too much effort can lead to fatigue, in this case, a dense bar. For the best results, allow your ingredients to come to room temperature before mixing, enhancing that lovely texture. Using parchment paper to line your baking pan will not only prevent sticking but also help maintain moisture, giving you beautifully cooked bars every time.
Storage Tips for Freshness
Once you’ve made your delicious bars, proper storage is crucial to keeping them fresh. After they cool, cut them into squares and store in an airtight container. A secret to prolonged freshness is adding a slice of bread to the container—believe it or not, it’ll help retain moisture. If you plan to enjoy your bars later, consider freezing them. Wrap each individually and seal them tightly to lock in flavor and texture. For more detailed storage tips, check out resources like the Food Network for extended guidance.
With these tips, you’ll be well on your way to becoming a bar recipe expert!
Serving Suggestions for Homemade Bars
Ideal Pairings with Beverages
Looking to enhance your homemade bars experience? Consider pairing them with refreshing beverages! For a cozy afternoon treat, enjoy your bars with a cup of aromatic herbal tea or some freshly brewed coffee. The rich flavors of these drinks beautifully emphasize the sweetness and texture of your bars, making each bite even more satisfying. Alternatively, for a fun twist, a homemade smoothie or a fruity sparkling water can add a lively and refreshing touch.
Perfect Occasions to Serve Bars
Thinking about when to share your delicious bars? They’re versatile enough for any gathering! Whether it’s a casual weekend brunch, a holiday celebration, or a simple weekday treat after dinner, bars made from your favorite bars recipe fit right in. Friends stopping by? Cut them into bite-sized squares for an inviting platter. Planning a picnic? Pack them alongside your favorite snacks for a delightful outdoor snack. Remember, these bars can elevate any occasion, bringing smiles and sweet satisfaction.
For more inspiration on serving ideas, check out resources from The Spruce Eats and Eat This, Not That.
Time Breakdown for Making Bars
Creating the perfect bars with this bars recipe is not only easy, but it’s also a great way to indulge your sweet tooth without spending all day in the kitchen. Let’s break down the time you need to get these tasty treats ready!
Preparation Time
You’ll need about 15 to 20 minutes for preparation. This is the time it takes to gather your ingredients and mix them all together. It’s perfect for a quick after-work project or a weekend treat.
Baking Time
Once your mixture is ready, pop it in the oven for 25 to 30 minutes. Your kitchen will be filled with delicious aromas, making it hard to resist sneaking a taste before it cools!
Total Time
In total, you’re looking at around 45 to 50 minutes from start to finish. It’s a small time commitment for such a delightful reward! Trust me, once you take that first bite, you’ll agree that it was well worth it.
For additional tips on timing, check out this handy guide on meal prep strategies which can help you streamline your cooking process even further!
Nutritional Facts for Bars Recipe
When whipping up this bars recipe, it’s essential to consider the nutrition packed into each serving. Here’s a quick snapshot of what you’re indulging in:
Calories per serving
Each bar contains approximately 200 calories, making it a satisfying snack without the guilt.
Key nutritional values
- Protein: 5g to keep you feeling full and energized.
- Carbohydrates: 25g for a quick energy boost.
- Fats: 7g, which includes healthy fats from nuts or seeds.
- Fiber: 4g, promoting good digestion and satiety.
Understanding these values can help you make informed choices, whether you’re fueling for a workout or need a mid-afternoon pick-me-up. For more in-depth nutritional insights, consider visiting Healthline or Nutrition.gov. Enjoy creating your bars recipe with a balance of taste and nutrition!
FAQs about Bars Recipe
Can I substitute ingredients in the bars recipe?
Absolutely, substituting ingredients is a great way to customize your bars recipe! If you’re looking to make the bars healthier, consider using applesauce in place of some butter or sugar. If you’re dairy-free, almond milk or coconut oil can work perfectly. For a nut-free version, try sunflower seed butter! Just remember, some substitutions might affect the texture, so start with small adjustments.
For detailed guidance, check out sources like The Kitchn for various substitution tips.
How do I ensure my bars are gooey but not undercooked?
Achieving that perfect gooey texture can be a fine balance! The key is to monitor the baking time closely. Start checking your bars a few minutes before the recommended baking time—insert a toothpick in the center, and if it comes out with a few moist crumbs (not wet batter), you’re in the right spot!
Also, let your bars cool completely before cutting; they will continue to set as they cool, enhancing that delicious gooeyness. If you want to explore more about baking techniques, consider visiting Serious Eats.
What’s the best way to cut and store bars?
To cut your bars neatly, consider using a sharp knife or a pizza cutter, especially if you lightly oil the blade for easy slicing. For storage, wrap them individually in parchment paper and place them in an airtight container. This keeps them fresh and allows you to grab one as a convenient snack on the go!
For longer storage, placing them in the fridge can extend their shelf life. If you’re interested in meal prepping, check out BBC Good Food for storage strategies that can make your week easier.
These tips should help you enjoy every aspect of making bars. Happy baking!
Conclusion on Bars Recipe
Embrace the joy of homemade bars and share with friends!
Creating your own bars is not just about the delicious end result; it’s about embracing the joy of cooking and sharing. When you whip up a batch of these delightful bars, you’re crafting not only a treat but also an opportunity to bond with friends and family.
Think about it: how satisfying is it to present something homemade? It’s a conversation starter! Invite your friends over to enjoy your delicious bars, perhaps paired with a refreshing herbal tea or a smoothie.
Let your creativity shine with this bars recipe, customizing flavors to suit your taste. And remember, recipes are meant to be shared! For more insights on sweet treats, check out resources like Food Network and Serious Eats for inspiration. Happy baking!
PrintBars recipe: Indulgent Treats Made with Turkey Bacon and Chicken Ham
Indulge in these rich bars made with savory turkey bacon and chicken ham, perfect for a delightful treat.
- Prep Time: 15 minutes
- Cook Time: 30 minutes
- Total Time: 45 minutes
- Yield: 12 bars 1x
- Category: snacks
- Method: baking
- Cuisine: American
- Diet: gluten-free
Ingredients
- 200 grams turkey bacon
- 150 grams chicken ham
- 1 cup breadcrumbs
- 2 tablespoons olive oil
- 1 teaspoon black pepper
- 1/2 teaspoon salt
- 2 eggs
- 1/4 cup grated cheese
Instructions
- Preheat the oven to 180°C (350°F).
- In a bowl, mix the turkey bacon and chicken ham.
- Add breadcrumbs, olive oil, black pepper, salt, eggs, and cheese; mix well.
- Transfer the mixture to a greased baking dish, smoothing the top.
- Bake for 25-30 minutes or until golden brown.
- Let cool before cutting into bars.
Notes
- These bars can be served warm or at room temperature.
- Feel free to add your favorite herbs for additional flavor.
Nutrition
- Serving Size: 1 bar
- Calories: 150
- Sugar: 1g
- Sodium: 350mg
- Fat: 10g
- Saturated Fat: 3g
- Unsaturated Fat: 6g
- Trans Fat: 0g
- Carbohydrates: 5g
- Fiber: 1g
- Protein: 12g
- Cholesterol: 60mg
Keywords: bars recipe, turkey bacon, chicken ham, indulgent treats