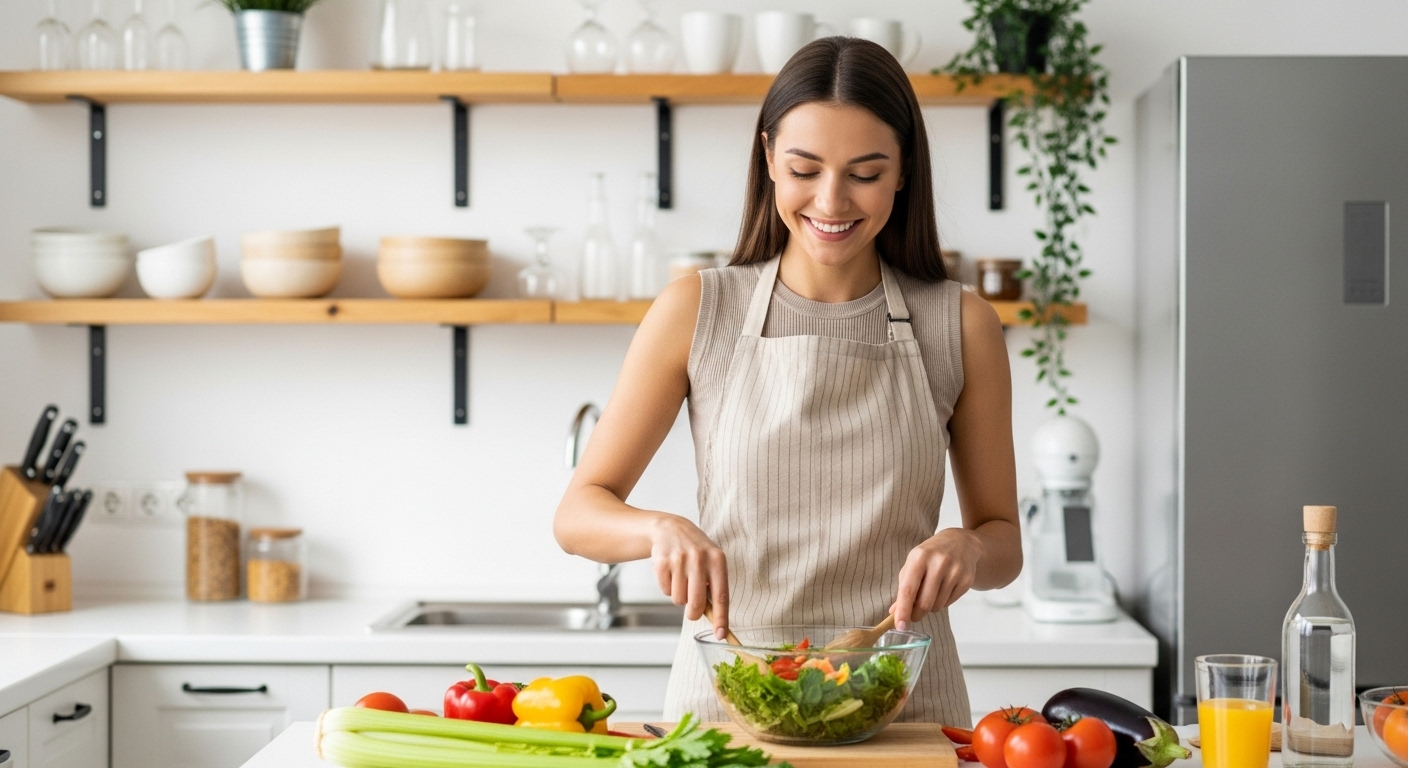
Introduction to Homemade Twinkies
Why make homemade Twinkies?
Have you ever found yourself reminiscing about those golden, cream-filled wonders from your childhood? Making homemade Twinkies is not just a delightful culinary project; it’s an opportunity to recreate a beloved snack that many of us have cherished over the years. While the store-bought versions can be tasty, there’s something uniquely satisfying about crafting your own version from scratch. You get to control the ingredients, ensuring they align with your taste and dietary preferences.
Additionally, a report from the Food Institute has indicated a growing trend in home baking, especially among young professionals. Cooking at home promotes healthier eating habits and allows for creativity that pre-packaged snacks simply can’t offer. By making your own Twinkies, you’re not just indulging in nostalgia; you’re also participating in a movement towards mindful eating.
A nostalgic treat for adults
Do you remember the excitement of unwrapping that creamy, spongey treat during school lunches or family road trips? Homemade Twinkies can bring back those simple joys, but with an adult twist. Imagine inviting friends over for a nostalgic dessert party featuring your take on the classic. You could even pair them with a great coffee or homemade chocolate milk to elevate the experience!
Creating these scrumptious snacks can also be a fun bonding activity. Invite a couple of friends over to bake together—there’s something wonderful about sharing the kitchen while chatting and laughing, all while mastering your baking skills. Plus, they make for an excellent dessert to impress a date or bring to a potluck.
If you’re worried about the time commitment, rest assured that making homemade Twinkies is easier than you think. Many bakers have found that the joy of crafting them is often faster than heading to the store, especially when you have easy-to-follow recipes at your disposal. So why wait? Your taste buds and fond memories are just a whisk away! Looking for inspiration? Check out resources like Serious Eats for delicious tips on making sponge cakes or preparing creamy fillings.
In the end, homemade Twinkies offer more than just a sweet treat—they provide a chance to connect with your inner child and bring joy to those around you. Don’t you think it’s time to start baking?
Ingredients for Homemade Twinkies
Creating your own homemade Twinkies is not only a fun project, but it also allows you to customize each bite. Let’s dive into the essential ingredients you’ll need to whip up those nostalgic treats!
Essential ingredients for the cakes
To get that light and fluffy cake texture, you’ll need:
- All-purpose flour: This forms the base of your cakes.
- Granulated sugar: For sweetness and moisture.
- Baking powder: Helps the cakes rise perfectly.
- Salt: Enhances flavor.
- Unsalted butter: For richness and a tender crumb.
- Eggs: Gives structure and helps bind everything together.
- Milk: Adds moisture and contributes to the soft texture.
These homemade Twinkies will be a delight for your taste buds!
Ingredients for the creamy filling
No Twinkie is complete without its iconic filling. Gather these simple ingredients:
- Heavy cream: For a rich base.
- Powdered sugar: Sweetness that dissolves smoothly.
- Vanilla extract: Adds a classic flavor.
- Cream cheese: Gives that extra luscious texture.
With these ingredients, you’re just a few steps away from creating a delicious treat. Want to dive deeper into baking techniques? Check out this comprehensive guide for tips on perfecting your baking skills!
Preparing Homemade Twinkies
If you’re diving into the delightful world of baking, making your own homemade Twinkies is an experience you won’t want to miss. These light, airy treats are surprisingly simple to create and allow you to indulge in the nostalgia of the childhood classic. With that, let’s get started!
Preheat and Grease the Pan
To kick things off, preheat your oven to 350°F (175°C). This step is crucial because a properly preheated oven ensures your cakes bake evenly. While the oven warms up, grab your Twinkie molds (if you don’t have these, consider getting silicone molds or a muffin tin for a different shape). Grease them thoroughly with butter or cooking spray. This not only prevents sticking but also adds a lovely flavor to your homemade Twinkies.
Sift and Mix the Dry Ingredients
Now, it’s time to gather your dry ingredients. You’ll need:
- 1 ½ cups all-purpose flour
- 1 teaspoon baking powder
- ½ teaspoon baking soda
- ¼ teaspoon salt
Sift these together in a medium bowl. Sifting aerates the flour, which is essential for keeping your cakes fluffy. Mixing these components ahead of time also allows them to combine thoroughly, which contributes to a consistent batter.
If you’re curious, sifting can significantly improve the final texture of baked goods. A 2019 study indicated that aerating flour can contribute to a lighter crumb, making your homemade Twinkies even more enjoyable.
Beat the Eggs and Sugar
In a separate large bowl, combine:
- 3 large eggs
- 1 cup granulated sugar
Using an electric mixer, beat them together at medium speed until the mixture becomes thick and pale. This should take about 3-5 minutes. Feel free to reminisce about those carefree afternoons spent watching cartoons while you wait for the mixture to transform into a beautiful fluffy batter.
Fold in the Dry Ingredients
Next, take your bowl of sifted dry ingredients and gently fold them into the egg mixture. Be cautious during this step—overmixing can lead to dense homemade Twinkies. Use a spatula to carefully combine the mixtures until just incorporated. Your batter should now be light and airy.
Combine Wet Ingredients and Fold into Batter
Now, for the wet ingredients. In a small bowl, mix together:
- ½ cup milk
- 1 teaspoon vanilla extract
Gently fold these into your batter as well. The vanilla adds a wonderfully nostalgic flavor, enhancing your homemade Twinkies and making your kitchen smell divine.
Fill the Molds and Bake
Carefully fill each mold about two-thirds full with your batter. You can use a measuring cup or a piping bag to make this easier and cleaner. Bake in your preheated oven for about 20-25 minutes, or until the tops spring back when lightly touched. You’ll know they’re done when they’re golden brown, and your kitchen starts to smell like a bakery!
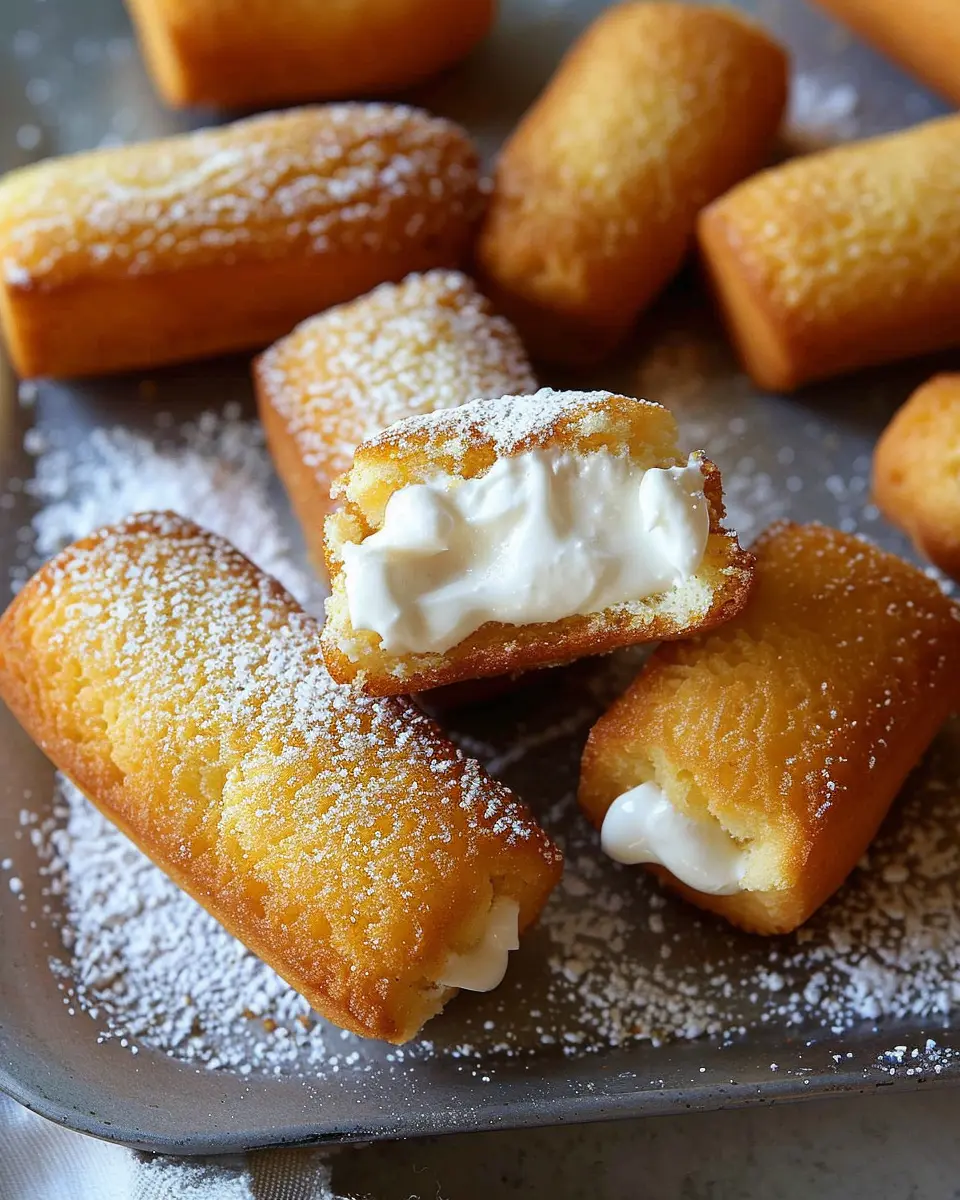
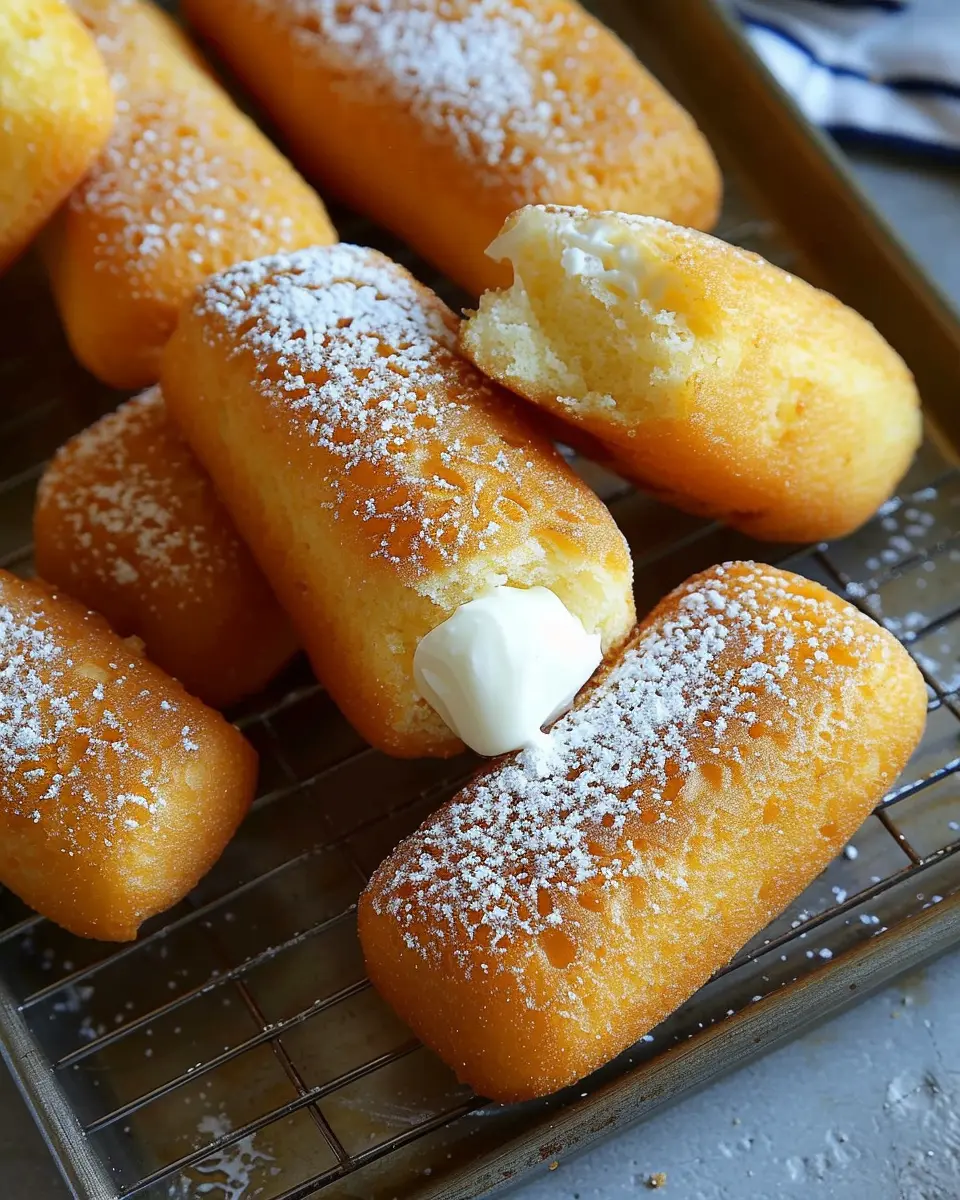
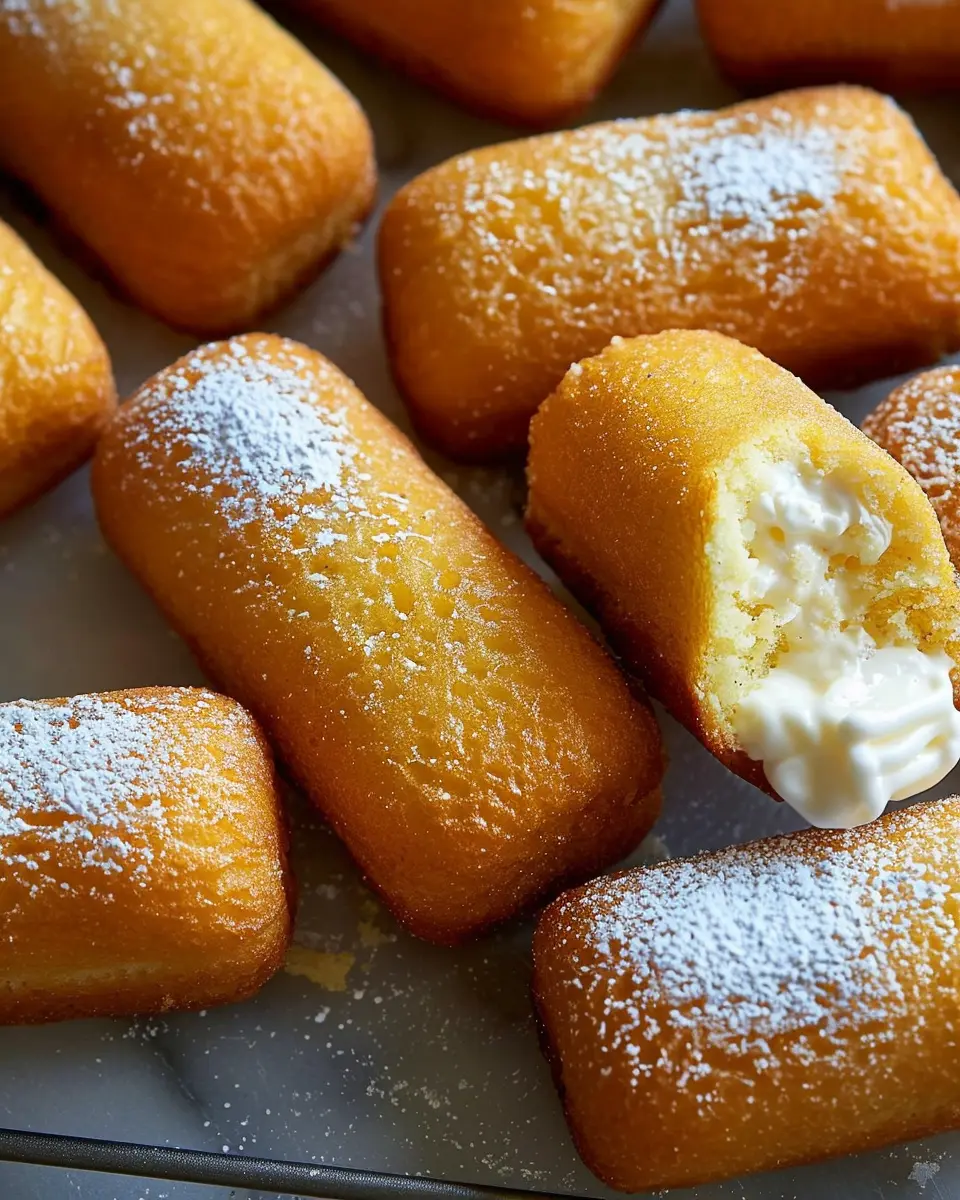
Let the Cakes Cool Before Filling
Once baked, allow the cakes to cool in their molds for about 10 minutes before transferring them to a wire rack. This is where the magic happens—without cooling, the filling could slip out and ruin your delicious creations.
Prepare the Filling and Pipe It In
While your cakes are cooling, prepare the filling. A classic Twinkie filling can be made by whisking together:
- 1 cup heavy cream
- ½ cup powdered sugar
- 1 teaspoon vanilla extract
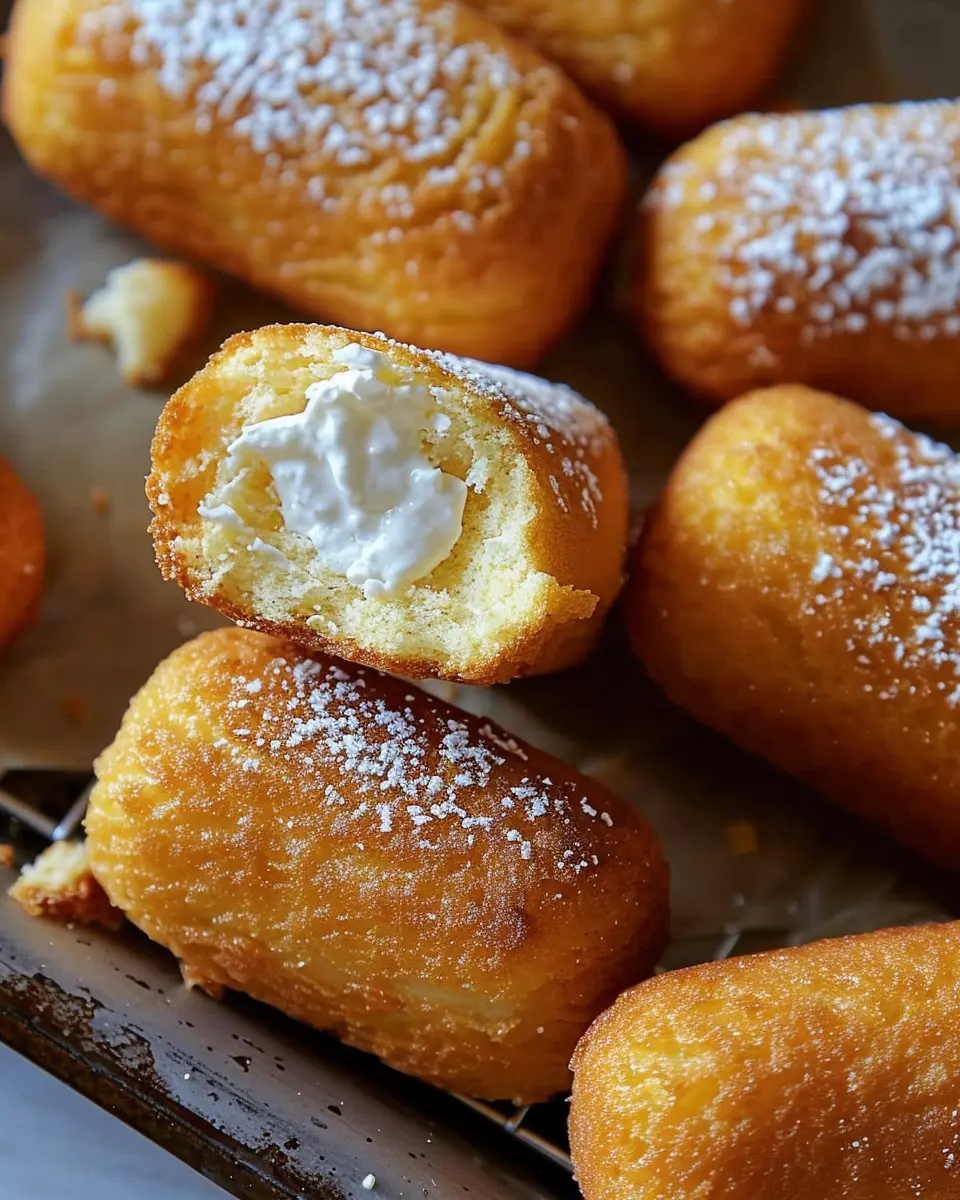
Whip these ingredients until they reach soft peaks. Once your cakes are completely cool, you can use a piping bag to inject the filling into the center of each cake, just like they do in the factory!
And there you have it—homemade Twinkies that are not only delicious but also a fun project for any aspiring baker. Enjoy them fresh or share them with friends, and brace yourself for compliments! Have you made any fun twists on this classic recipe? Let us know!
Variations on Homemade Twinkies
Homemade Twinkies are a delightful treat that can cater to various tastes and dietary preferences. Here, we explore some fun and delicious variations that you can easily whip up at home.
Chocolate-filled Twinkies
These homemade Twinkies take a classic snack to the next level. Swap out the traditional cream filling for a rich chocolate ganache. Here’s how:
- Prepare your Twinkie batter as usual.
- Make a simple ganache with equal parts dark chocolate and heavy cream. Heat the cream and pour it over chopped chocolate; stir until smooth.
- Let the ganache cool slightly, then fill your cooled Twinkies, offering a luscious chocolate surprise in every bite.
For extra chocolate goodness, consider drizzling some melted chocolate on top or adding chocolate sprinkles.
Gluten-free Twinkies
If you’re embracing a gluten-free lifestyle, you can still enjoy the nostalgia of Twinkies. Substitute all-purpose flour with a gluten-free blend. Here are some tips:
- Use a mix of almond flour and coconut flour for a rich texture.
- Ensure your baking powder is gluten-free and double-check your other ingredients as well.
The result? A light, fluffy treat everyone can enjoy!
Twinkies with Fruit Flavors
Why not explore fruity flavors for your homemade Twinkies? From strawberry to lemon, the options are endless. Here’s how to give them a fruity twist:
- Replace vanilla extract with fruit extracts (like strawberry or lemon).
- Incorporate fruit purees into your filling. For example, mix fresh strawberry puree with whipped cream for a refreshing filling.
Adding fruit not only enhances the flavor but also brings a touch of natural sweetness.
For more inspiration, check out this helpful resource on flavor pairings here and discover endless possibilities for your Twinkies! With a few simple tweaks, your homemade Twinkies can satisfy every palate, making snack time a whole lot sweeter.
Cooking notes for Homemade Twinkies
Tips for achieving the perfect cake texture
For your homemade Twinkies, focus on the consistency of your batter. Light and airy cakes come from well-whipped egg whites, so don’t skimp on this step! Make sure you gently fold the egg whites into the batter to preserve that fluffy volume. Using cake flour instead of all-purpose flour can also enhance the texture, giving you that tender crumb reminiscent of traditional Twinkies.
How to handle the filling
When whipping your filling, aim for a silky, smooth consistency that’s not too runny. Make sure your butter is softened but not melted for optimal results. For an extra kick, consider adding a pinch of salt to balance the sweetness. To fill your homemade Twinkies, use a piping bag with a long tip to reach the centers easily; this ensures each bite is perfectly sweet and creamy.
For further guidance, check out this article on cake baking tips and enhance your skills!
Serving suggestions for Homemade Twinkies
When you’ve crafted your delicious homemade Twinkies, the fun isn’t over! Here are some delightful serving suggestions that will enhance your treat and impress your friends.
Pairing ideas for drinks and snacks
To complement your homemade Twinkies, consider pairing them with:
- Milk: Nothing beats the classic combo of cake and milk. Opt for chocolate or strawberry milk for a fun twist.
- Coffee: For a more adult touch, enjoy them with a warm cup of coffee. The flavors meld beautifully!
- Fruit Smoothies: Blend together your favorite fruits with yogurt for a refreshing, fruity contrast. This works great with chocolate or vanilla Twinkies.
Creative ways to present Twinkies
Presentation is key! Here are a few ideas to elevate your homemade Twinkies:
- Dessert Platter: Arrange them artfully on a platter with strawberries or blueberries. This not only looks stunning but adds a burst of flavor!
- Mini Twinkie Sundaes: Cut them in half and layer them with ice cream and toppings. Perfect for a sweet treat or a fun party dessert.
- Decorative Boxes: Package them in cute boxes tied with a ribbon for a lovely gift or party favor. Who wouldn’t love a box of homemade goodness?
For more inspiration, check out how food presentation can transform your dishes on Food & Wine. Enjoy your creations!
Tips for Perfecting Homemade Twinkies
When it comes to creating the ultimate homemade Twinkies, a little know-how can go a long way. Let’s dive into some essential tips to help you avoid common baking blunders and ensure your treats stay fresh and delicious!
Avoiding Common Baking Mistakes
Baking can be tricky, but with a few straightforward practices, you can nail your Twinkies:
- Measure Your Ingredients Accurately: This is key! Use a kitchen scale to weigh flour and sugar for precision, helping to create that perfect sponge cake.
- Room Temperature Ingredients: Make sure your eggs and butter are at room temperature. This promotes better mixing and a lighter texture.
- Don’t Overmix: Once you combine your dry and wet ingredients, mix just until incorporated. Overmixing can lead to denser Twinkies.
For more tips on baking basics, you might find this guide from Serious Eats quite handy!
Storage Tips for Freshness
To keep your homemade Twinkies tasting fresh for as long as possible:
- Wrap Them Individually: After they cool, wrap each Twinkie in plastic wrap to prevent them from drying out.
- Use an Airtight Container: Store wrapped Twinkies in an airtight container at room temperature for up to a week or refrigerate them for longer shelf life.
- Freezing for Later: If you want to enjoy them later, freeze them individually. Just thaw at room temperature for a delightful treat anytime!
Keeping these tips in mind will not only enhance your baking experience but also make your homemade Twinkies a crowd-pleaser every time!
Time details for Homemade Twinkies
Preparation time
Making homemade Twinkies is a delightful experience that starts with about 20 minutes of preparation. Gather your ingredients, such as flour, sugar, and eggs, along with your trusty mixing tools, and you’ll be on your way to creating a nostalgic treat.
Cooking time
Once your batter is ready, pop those little cakes into the oven for roughly 15-20 minutes. You’ll want to keep an eye on them, as every oven behaves a bit differently!
Total time
In total, you’re looking at approximately 40-45 minutes from start to finish before you can enjoy your freshly baked homemade Twinkies. There’s something so satisfying about creating a childhood favorite in your own kitchen. For tips on perfecting your baking skills, check out this helpful guide on baking basics. Happy baking!
Nutritional information for Homemade Twinkies
Calories and Serving Size
A delightful serving of homemade Twinkies typically contains around 300 calories. This classic treat, perfect for satisfying a sweet tooth, is generally enjoyed in portions of one Twinkie, making it an ideal indulge when you’re looking to treat yourself without going overboard.
Key Nutritional Highlights
Homemade Twinkies bring some interesting nutritional elements to the table:
- Fat: Approximately 15 grams, which includes both saturated and unsaturated fats.
- Carbohydrates: About 40 grams, helping to provide that quick energy boost.
- Protein: Roughly 2 grams, making it a low-protein snack option.
- Sugar: Around 20 grams, balancing sweetness with that nostalgic flavor we all crave.
While it’s easy to indulge, consider enjoying these treats occasionally as part of a balanced diet. For more tips on healthy snacking, you might find resources like the American Heart Association helpful. Always remember, moderation is key!
FAQs about Homemade Twinkies
Making homemade Twinkies can be a fun and rewarding experience, but you might have some questions about the process and storage. Let’s dive into some common questions!
Can I use egg substitutes in Twinkies?
Absolutely! If you’re looking to make vegan or egg-free homemade Twinkies, there are several great substitutes you can consider:
- Flaxseed Meal: Mix one tablespoon of flaxseed meal with three tablespoons of water. Let it sit for a few minutes until it thickens.
- Applesauce: Replace each egg with 1/4 cup of unsweetened applesauce for moisture and sweetness.
- Silken Tofu: Blend 1/4 cup of silken tofu until smooth and use it as a replacement for one egg.
These alternatives can help maintain the moist texture that makes Twinkies so delightful!
What’s the best way to store homemade Twinkies?
To keep your homemade Twinkies fresh, it’s best to store them in an airtight container. Here’s how:
- Room Temperature: If you plan to eat them within a few days, simply keep them in a cool, dry place.
- Refrigeration: For longer shelf life, you can store them in the fridge, but they may lose some softness.
For optimal flavor, consider wrapping each Twinkie individually in plastic wrap.
How long do they last?
Unfrosted, homemade Twinkies last about 3-4 days at room temperature and up to a week in the refrigerator. If you’ve frosted them, aim to consume them within 3-5 days for the best taste and quality. You can also freeze Twinkies for up to a month if you want to enjoy them later. Just remember to wrap them tightly to prevent freezer burn!
For more tips on food storage, check out resources from The USDA on food safety best practices. Happy baking!
Conclusion on Homemade Twinkies
Recap of the Joy of Homemade Twinkies
Creating homemade Twinkies is not just about enjoying a delicious treat; it’s about the experience that comes with it. The nostalgic taste and the simple pleasure of baking at home can transform a regular day into something special. Did you know that making these delightful snacks from scratch allows you to experiment with flavors and fillings, making them uniquely yours? It’s like a trip down memory lane, one bite at a time.
Encourage Readers to Try the Recipe
I encourage you to roll up your sleeves and give this recipe a try! Whether you’re a seasoned baker or a kitchen novice, the joy of crafting your very own Twinkies is unmatched. Trust me, the smile on your face when you take that first bite will make it all worthwhile. Plus, once you share them with friends, you’ll likely find a new favorite tradition in your home! Want more inspiration? Check out this baking guide for additional tips and tricks to elevate your homemade desserts.
PrintHomemade Twinkies: Indulgent Treats You Can Easily Make at Home

Indulge in the delightful taste of homemade Twinkies, a classic treat that you can make right in your kitchen.
- Prep Time: 15 minutes
- Cook Time: 25 minutes
- Total Time: 40 minutes
- Yield: 12 Twinkies 1x
- Category: Dessert
- Method: Baking
- Cuisine: American
- Diet: Vegetarian
Ingredients
- 1 cup all-purpose flour
- 1/2 cup granulated sugar
- 1/2 teaspoon baking powder
- 1/4 teaspoon salt
- 1/4 cup unsalted butter, softened
- 1/2 cup milk
- 2 large eggs
- 1 teaspoon vanilla extract
Instructions
- Preheat the oven to 350°F (175°C).
- In a mixing bowl, combine flour, sugar, baking powder, and salt.
- Add the softened butter and mix until crumbly.
- Pour in the milk and add eggs, mixing until smooth.
- Fold in the vanilla extract.
- Pour the batter into a Twinkie pan and bake for 20-25 minutes.
- Let cool completely before filling with cream.
Notes
- For a richer flavor, substitute half of the milk for buttermilk.
- Add a pinch of nutmeg for a unique twist.
Nutrition
- Serving Size: 1 Twinkie
- Calories: 150
- Sugar: 10g
- Sodium: 200mg
- Fat: 7g
- Saturated Fat: 4g
- Unsaturated Fat: 3g
- Trans Fat: 0g
- Carbohydrates: 20g
- Fiber: 0g
- Protein: 2g
- Cholesterol: 40mg
Keywords: Homemade Twinkies, Twinkie recipe, desserts